DIY Letterpress Tray, Display Shelf Tutorial
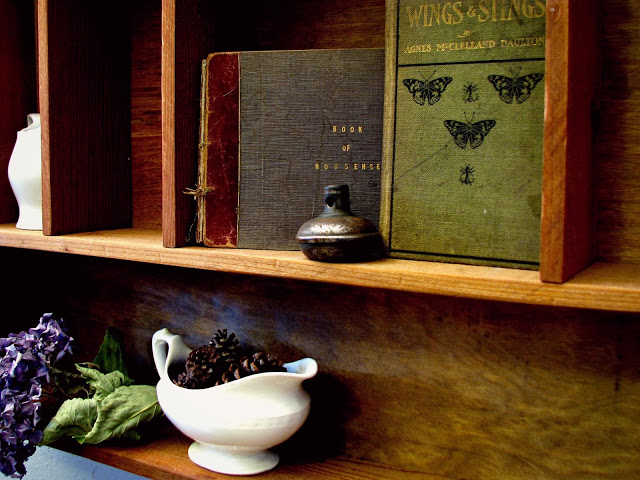
I shared my DIY Letterpress tray inspired shelf last week and promised I'd write up a tutorial. I haven't written up a full blown tutorial in quite awhile so I thought why not. I built the shelf specifically to display my Santa collection so the cubbies needed to be large. Click here if you want to see it full of Santas. For this post I thought I'd dress it up with some fun things I have around the house so we can all see it a different way.
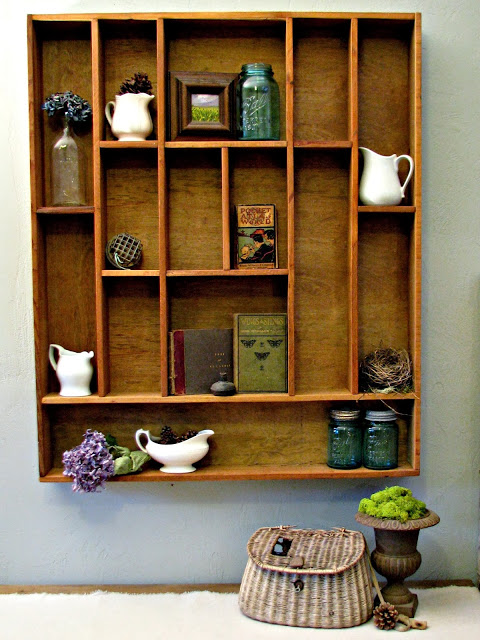
I love the rich worn patina old letterpress drawers have and of course all the cubbies.
Initially I thought about using pine for my shelf because it is inexpensive but the 3/4" thickness was more than I wanted. When I went to the local lumber yard to buy the wood they had a stack of cedar fence boards out front for about $2 each. Perfect! They were less expensive and only 1/2" thick. The only issue was they are 5.5" wide so I had to rip them down with my table saw.
Cedar fence boards are rough so after I cut my pieces I sanded them smooth using my electric sanded with 100 grit sand paper. They sanded really easily. I am very happy with how the cedar turned out. I think it looks a lot richer than pine would have.
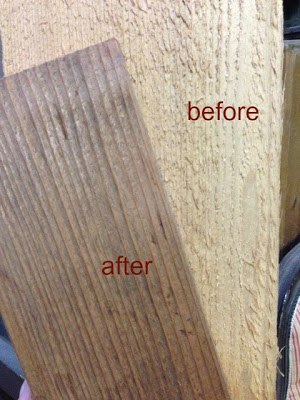
I sanded and applied the finish before I build it. Cubbies are a nightmare to get inside of to paint, stain, or finish. For my finish I used Watco Danish Oil Finish in natural with a little bit of Minwax Jacobean oil base stain mixed with it. Jacobean is a dark brown with green undertones and it helped tone down the orangeness of the cedar. It's still pretty warm toned but that works in my house. Cedar really soaks up stain so that is why I diluted it in the finish. I didn't want it to be too dark. Disclaimer: It does not say you can mix the two different products together on either label so I never said you should, but it worked for me ;). I decided to use the Danish oil because I love the patina it gives. It's kind of a dull sheen that looks close to a hand rubbed time worn finish. Other good options for a finish would be wipe on polyurethane in a satin finish, or a wax with a low sheen.
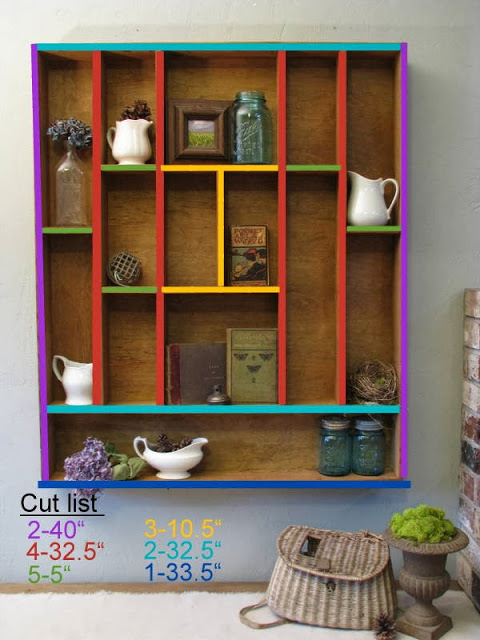
The colorful diagram above hopefully helps demonstrate how the shelf is constructed.

It was really hard to come up with a plan for this that would make sense. I'm not sure I achieved it ;) Note: If the measurement is in ( ) it means spacing, the board is not actually cut to that length.
To make your own shelf the first thing you will need to do is rip down seven fence boards on a table saw to 4" wide. (Use all the safety precautions necessary with power tools) If you don't have access to a table saw you can just make a 5.5" deep shelf. If you use pine 1 x 4's you will need to alter the measurements for the extra thickness.
Cut List
2 @ 40"
6 @ 32.5"
5 @ 5"
3 @ 10.5"
1 @ 33.5"
1/4" plywood for the back cut to 40.5" x 33.5". I just used the inexpensive stuff sometimes called underlayment or Luan. They will cut it for you at the lumberyard.

Assemble your shelf with wood glue and nails. If you don't have a nail gun you can pre-drill and hammer the nails in by hand. I recommend starting from left to right so you can get your nail gun to shoot straight in from the side for most of the shelves.
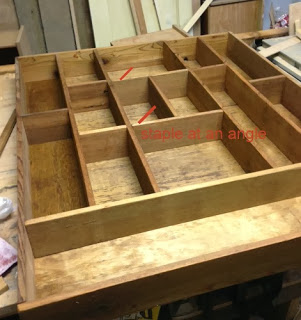
The ones you can't get to from the side nail in at an angle through the front and back.
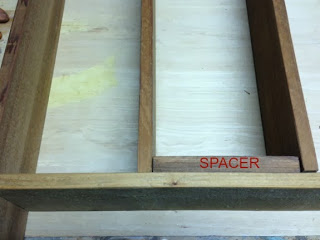
Instead of measuring for all the shelf placements I used scraps of wood cut to 5" and 10.5" as spacers for most of the cubbies, it's faster. I found that fence boards aren't all perfectly 1/2" thick so you may have a little adjustment to make to the last shelf.
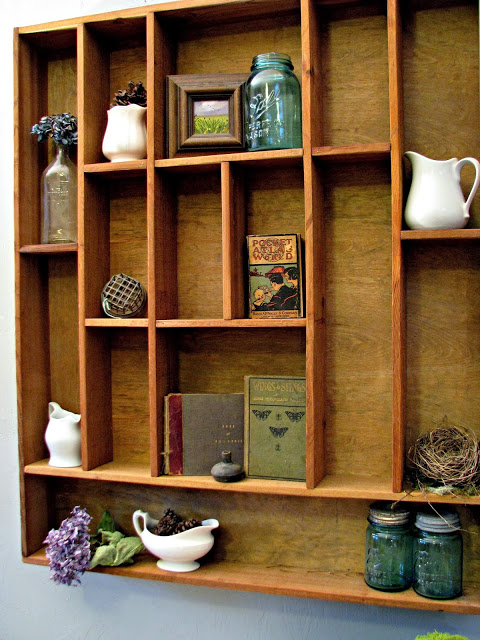
So many possibilities for cubbie sizes. I kept mine pretty symmetrical but left that one extra long cubbie just to mix things up.
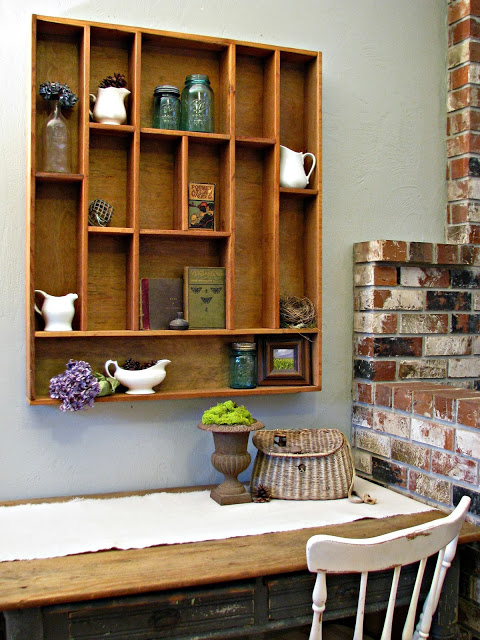
I'm really happy with it. The only thing I kinda wish I had done differently is to use thicker cedar on the outside boards to look more like a letterpress tray does. Oh well, still love it.

