Last week I revealed my custom built cabinets in my dining room. Thank you for your sweet comments. You guys are the best! For that post go
. Today I just want to show how I put them together and the cost.
When I was thinking about what I wanted to do, should I build custom cabinets or should I look for salvaged ones to modify I happened to be surfing Ana White's website. Right on her home page she had a post about how to make your own kitchen cabinets. I have built them before when I did my sisters kitchen remodel but her post reminded me how easy it is to make a cabinet. You basically just build a box. Here's a link to
website
I found it very helpful
. She gives all kinds of tips and things to think about before you start. She is awesome.
To make my cabinets I purchase a sheet of plywood at the local lumber yard. I had them cut it into 16" strips which is the width I needed. I couldn't fit the 4' x 8' sheet in my car. So even if you don't have a table saw you can still do this. The lumber stores have panel saws and they can set the measurement once and run the 4' x 8' sheet through several times. Most times I have done this they come out great.
I opted to purchase ACX plywood because it's half the price of furniture grade plywood. What that means is one side is grade A and is very smooth the other is grade C. The C side really isn't that bad and after a little sanding, priming and painting I'm happy with it. I made sure to use the C side on the inside of the cabinets and underside of the shelves.
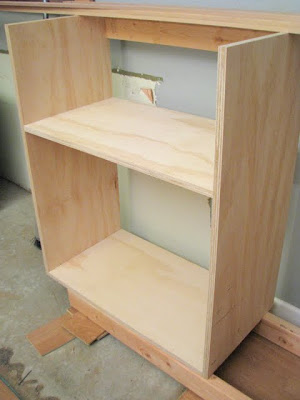
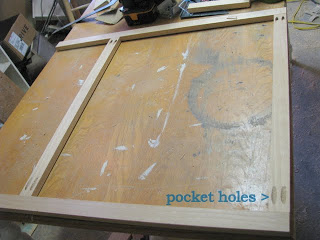
To make each cabinet I used my Kreg jig Jr and drilled pocket holes into the two shelves. Bad blogger I didn't take pictures because I was on a mission. The pocket holes make a strong tight hold. I used a 1 x 4 scraps I had across the back for support.
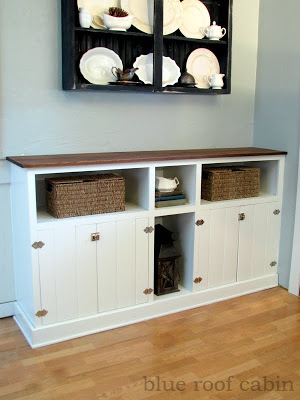
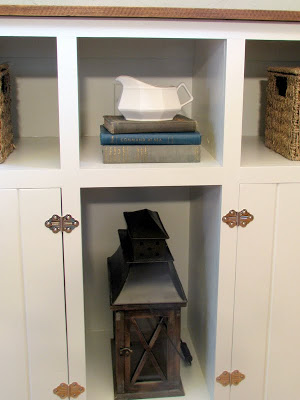
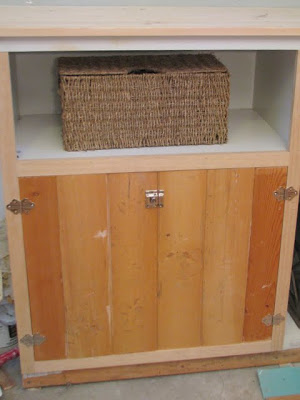
For the design I wanted some open shelves for display and some storage behind doors.
Our crazy wall has a weird overhang at 39.75" so I chose to work with it and make them tall. I built two cabinets that are 30w X 36h X 16 deep. With the 2 x 4 base that brought total height to 39.5". I then spaced them 12" apart and added shelves between them.
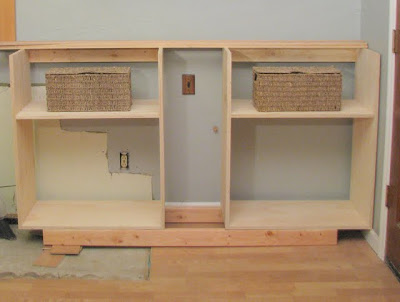
Here I am trying it out. The floor is crazy unlevel so there is some serious shimming going on. I hadn't removed the flooring from under it yet either.
For the back of the cabinets I used a sheet of 1/4" underlayment and made sure they were nice and square by measuring corner to corner. I then attached with glue and nails.
So I mentioned that the floor is not level right? I had made a 72"x16" base out of 2 x 4's for the cabinets to rest on but the far right back corner was so high I couldn't use it that way or I would have to shim every other corner over 1/2". I ended up doing what is pictured below. Not pretty but it worked. It will be covered by base trim so no one but you and me will know.
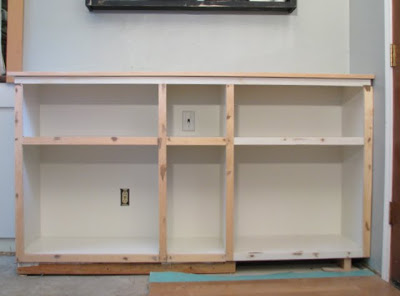
Oh and how could I forget there is an outlet and a switch inside my cabinets. Of course there is. The switch is to a light we don't use and the outlet we rarely used. Mostly for charging things which we can still do just leave them in the cabinet out of sight while charging.
Next for the doors. Cabinet may be easy but doors are the hard part. I decided to build tung and groove doors to tie in with the area around the banquette and kitchen. In Ana's White post she suggests that you can purchase just the doors from cabinet manufacturers and make the boxes yourself. I think that's a great idea since doors can be tricky. You also might get lucky at Salvage stores and find doors for just a few dollars each, but you have to be patient for that.
I first made a face frame out of 1 x 2 clear pine using pocket holes again.
I cut the tung and groove to length and played around until I figured out how I wanted them to be spaced since some of them had to be cut down.
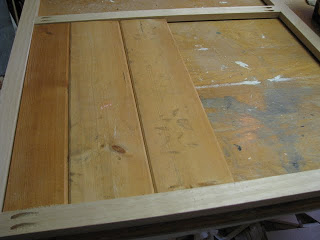
Where they meet in the middle I decided to cut the tung off the bottom of one using my table saw so they could overlap.
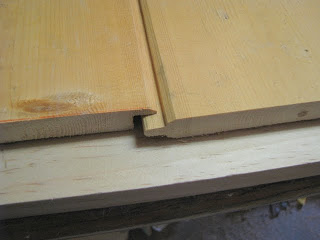
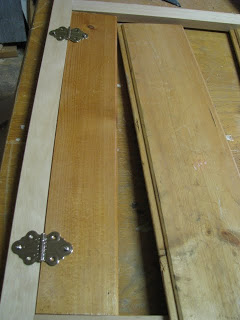
To install I attached the hinges to the first board then flipped everything over and placed the rest of the boards. I glued them together and added 1 x 2 supports to the back. The tung and groove makes it very forgiving because you have a little play in it to minimize the gaps. The boards are not perfectly flat though so the don't fit together "perfectly". That's okay with me but if you want perfection you might want to go with a different style.
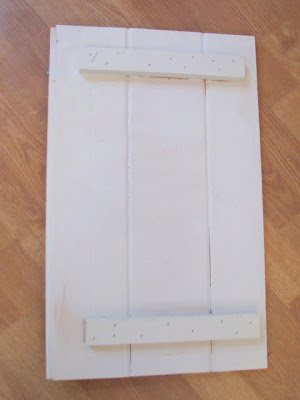
I then attached the face frames to the cabinet by gluing and nailing from the front. Another way to do it would be to use pocket holes from the inside to attach the face frame. I would have done that if the top part wasn't going to be open. You would have been able to see the pocket holes and I felt filling small nail holes in the front was easier then filling large pocket holes.
To attach the top I used small 1 x 1 strips of wood and screwed them to top and then the cabinet from inside the cabinet. Again I could have used pocket holes but didn't want to have to fill them. Oh and the fact that a drill won't fit in that small space to be able to use the pocket hole anyways. (note: if you want to use pocket holes to attach face frame and the top make sure to drill them before you put everything together or your drill might night fit in the cabinet with that long drill bit on it , just sayin.) See lots of little things to think about when you build custom.
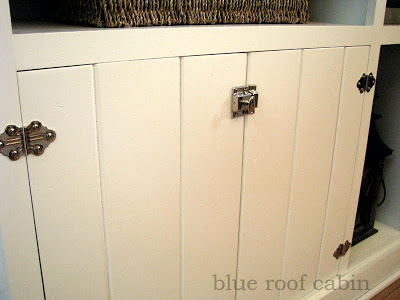
I then caulked, and used wood filler on all the cracks and nail holes. One coat of primer followed by two coats of semi gloss latex paint finished her off.
Well that's how I did it. I hope this inspires you to go build some cabinets yourself or at least think about it.
Cost breakdown.
I am listing prices for purchasing new wood and hardware but some of the wood I had in my stash. The Hardware I splurged on because I wanted a specific type and I wanted it now :)
$30 1- 4' x 8' ACX Plywood -(cabinet boxes)
$20 4- 1 x 2 x 8 clear pine boards (face frame)
$11 1- sheet of 1/4" underlayment (back of cabinets)
$18 3- 8ft pine tung and groove
boards (doors)
$6 2- 2 x 4 x 8 (cabinet base)
$4 1- 1 x 4 x 8 pine (base trim)
$29 3/4 x 16 x 96 stain grade pine (top)from Lowes
$18 2 turn style knobs
$28 4 sets of vintage looking hinges.
$0 Paint, primer, caulk, screws, etc I had in my stash
______
$164 For custom built cabinetry! Thanks for stopping by.
