DIY Garden Trellis
Finally the sun came back so I could finish my new DIY garden trellis. I have been working on the last few touches to get my new patio area ready to share and then it rained for two weeks. Torture.

This patio is right next to our detached garage so I designed my trellis to coordinate with the Garage Trellis I built two years ago.
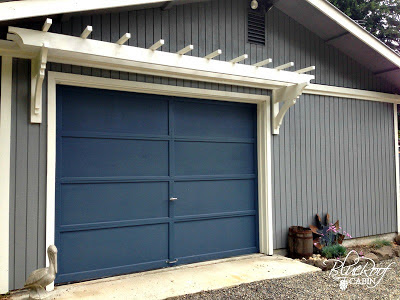
To see my post on how to build a Garage Trellis click here.
To build my trellis I used some more of the salvaged wood we still have left from the shed we tore down. That's why my wood is blue. We have almost used all of our stash I don't know what I will do when I don't have a pile of wood to pick through anymore.
Lumber needed:
2- 4x4x8'
1- 2x6x8'
2- 2x2x8'
1- 2x4x8'
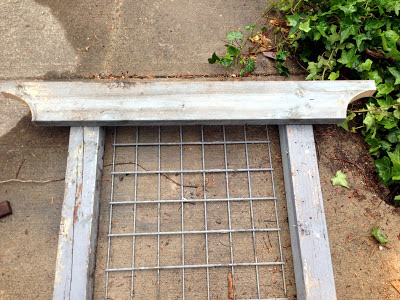
I started with two 4 x 4's cut to my desired length. Then I cut a 2 x 6 into two 48" pieces. Next I cut a curve out of each end of the 2 x 6's with my jig saw.

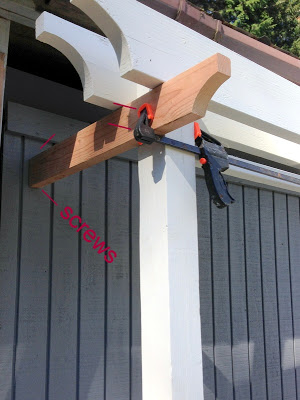
I measured 1 1/2" down and 5" over to draw out my curve. Then I attached the 2 x 6's to the 4 x 4 posts with screws.

To support the trellis part I used 2 x 2's cut to 23" between the two posts and attached them with screws at an angle. I pre-drilled to avoid splitting the 2x2's. The screws are on the back side so you don't see them. I primed and painted everything before moving on.

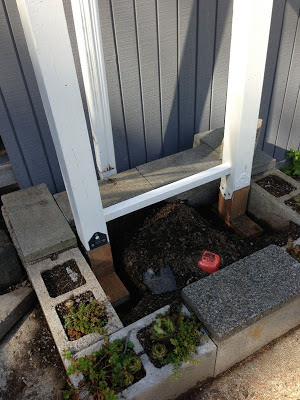
Okay so this next part is a little different. I made little feet for my trellis. There a couple reasons why I did this. First, my reclaimed lumber 4 x 4's were not pressure treated. Second they were shorter than I wanted them to be. Since I also attached the trellis to the wall it is plenty sturdy.
(at this point it reminded me of Foghorn Leghorn for some reason do you see it? )
I attached the feet to the trellis with metal 4x4 brackets. Now I can cover them with dirt and not worry about them rotting. Another solution would have been pier pads or digging a hole and using concrete. I didn't have room for that.
Once the trellis was in place and level I attached it to the wall using 2 x 4's. I cut more curves out of the ends to match the top boards.
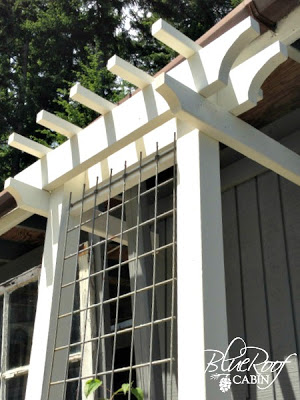
To finish it off I attached five pre-painted 2x2x18" boards to the top with nails. I would recommend doing this before you stand the thing up. Then you don't need to get on a ladder like I did. Hubby was leaving and I needed his help to lift the thing into place so I had to do it this way. Only smashed one finger.
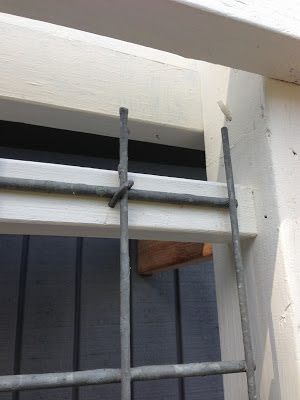
To finish I added a metal grid to the middle and attached it to the 2 x 2's with small metal staples used for wire fencing. The grid was something my husband had left over from a job he did. It's called galvanized welded wire mesh and it's used in concrete work. It came as a panel that was about 22" wide and 8' long. I had to cut about a foot off with bolt cutters. I like it because it is rigid and galvanized so it wont rust. (although rusty would look cool too) Also I thought the grid pattern tied in nicely with the large window next to it. You can Google concrete/building suppliers in your area to find some.
I planted a Clematis next to the trellis. The back six inches of my planter box are off the concrete pad so there is more room for the roots and drainage.
This little area is almost complete but I need to do a little more clean up and find some furniture before I show you the whole thing so stay tuned. Have a great weekend!
