Faux Mantel Updated with Rustic Wood
I am struggling with what the heck to title this post because pallet wood tiled faux fireplace fire box in herringbone pattern seemed to long. I also cannot believe I haven't posted in so long. What in the world have I been doing? One thing is I cleaned and organized my workshop including building a new work bench. I have been working in there long enough now to know what works and what doesn't. Also it's my office and I need it to be pretty. The harsh yellow walls were getting to me. I'm still not done but once I am maybe I will give you a tour.

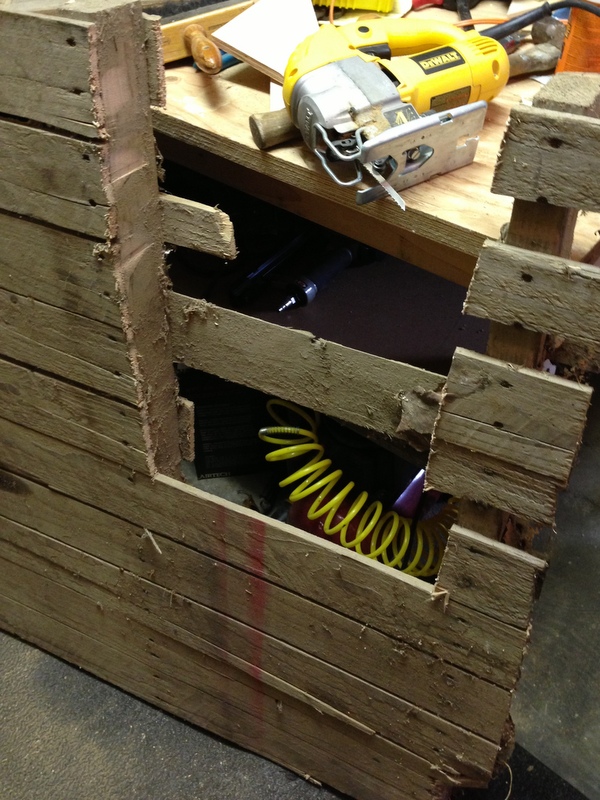
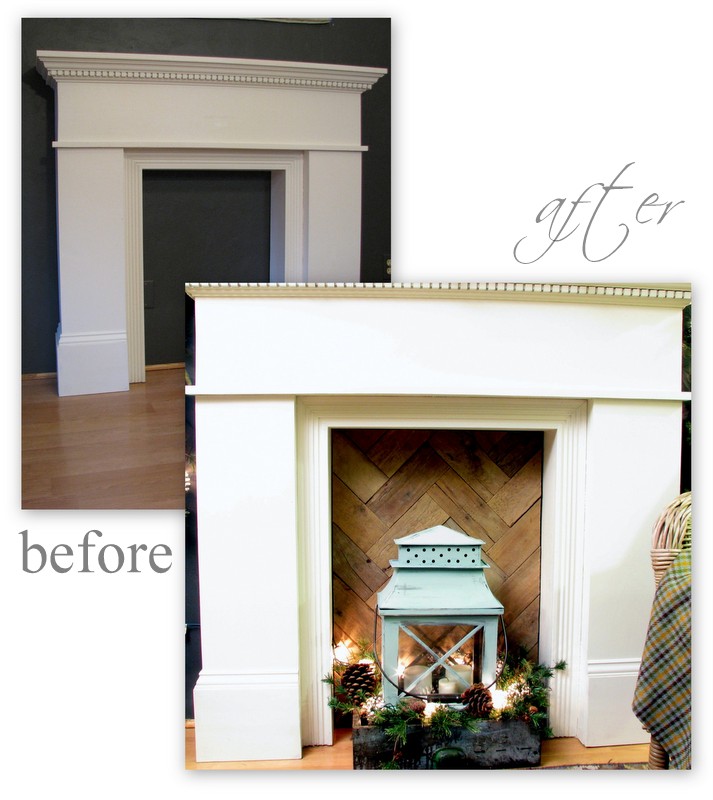
Moving on. My mantel. I still love it, in all it's fauxness. There was one thing that has been bugging me though. It was that the inside of the "fire box" was the same color as my wall which is dark charcoal gray.

This made anything I put in there get lost in a black hole. I have been tossing around different ideas until I thought of something. Rustic wood laid in a herringbone pattern.

Perfect. It ties in with the rustic mirror above the mantel and you know I just love rustic wood. Free pallet wood is even better. We had the perfect pallet for the job in our carport holding our pellets for the pellet stove. The slats of wood are thinner than most pallet boards and they are perfectly grayed out. Well they were perfectly gray until I washed them and discovered most of the gray was dirt.
(Wow that's an ugly picture)
The nice thing about this project is that I only needed small pieces of the wood so I decided instead of totally dismantling the pallet I would just use my jig saw and cut the thing apart. If you've ever taken a pallet apart you know what a pain it is. Then I just stacked the cut pieces up and cut about six at a time on my chop saw to straighten them up.
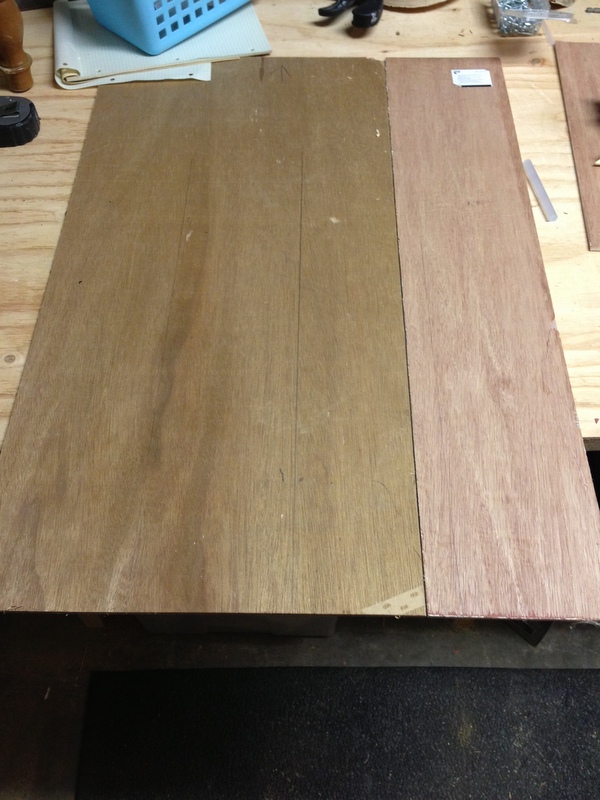
To figure out what length to cut all my pieces I started by measuring the space and cutting a piece of 1/4" plywood/luan to size. I didn't have a scrap big enough so I used two.
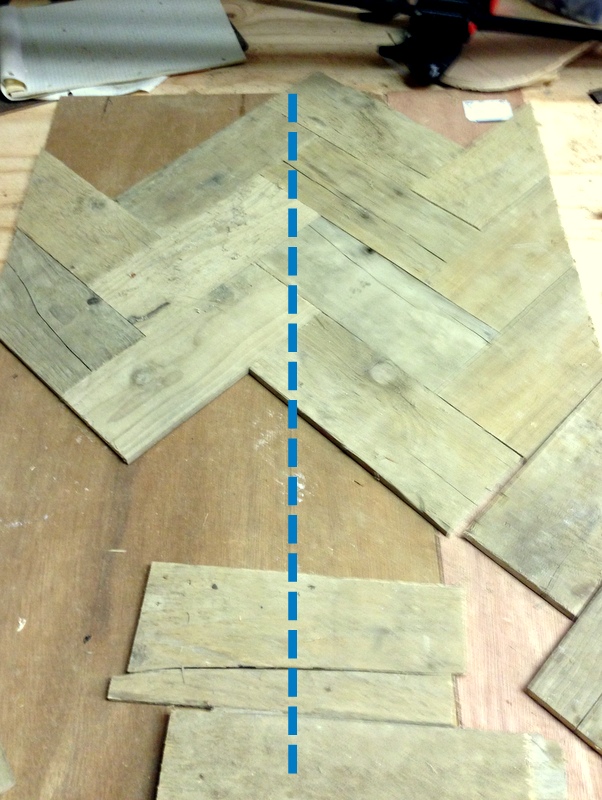
I'm sure there is a fabulous tutorial out there on how to determine where to start your herringbone pattern but I didn't look for one I just eyeballed it. I played around until I determined that for my project 9" pieces were the ticket. The thing about a herringbone pattern is centering it. You would think you would center it on the point of the top board but actually it looks better if you center in the middle of the top board. See the photo above. For the side pieces once I figured out the length of one the were all the same. I cut the 45 degree angle on my chop saw. The top and bottom pieces were not the same sizes so I just glued pieces on and trimmed with my jig saw. Since this project wasn't going to be handled a lot I hot glued the boards
to the plywood. It worked great. I didn't even have to attach to the wall it fit tight enough to just pop it in there.
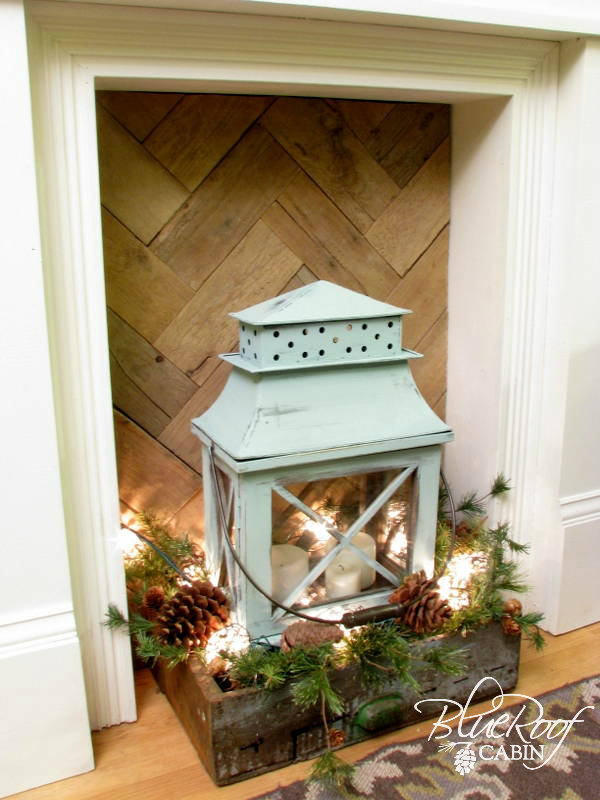
I love the texture it adds and how it lightens things up a bit. I'm still tweaking the mantel decoration that's why I haven't shown it to you. Hopefully I will have it ready tomorrow. With the dark walls things don't always look as good in photographs as they do in person. Couldn't possibly be the photographer ;)
Thanks for coming over. I appreciate you all so much. Have a great week!
