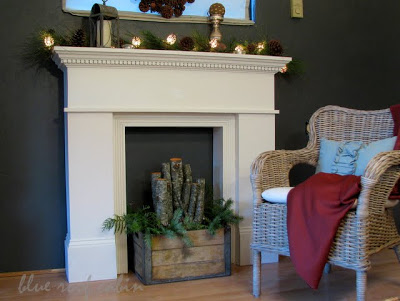
DIY MANTEL
Just because a girl doesn't have a fireplace doesn't mean she cant have a mantel right? I mean who really builds a fire that often anyway?
I really wanted a mantel & obsessed about it for months talking myself out of it then wanting it again. I couldn’t shake it, I must have one. The ideas fly in and out of my brain, some stick some don't, my to do list constantly shifts. This time the thing that pushed it from I want to I must build was a piece of molding I found at the Restore. An eight foot piece of dentil molding for $4. Score. I also had in my stash some fluted trim that I got at the Restore as well. I go there almost every Friday on my lunch break and if I see a deal I pick it up even if I don't have a use for it. I decided to keep the design very simple to let the two moldings stand out.
I needed to finish this thing fast since I really wanted to decorate the mantel for Christmas. I decided to use pine boards and make it work with the boards measurements so I wouldn't have to spend a weekend making fancy cuts. I mostly just butted the boards up to each other rather than miter cutting everything. The only cuts I did miter were for the trim.
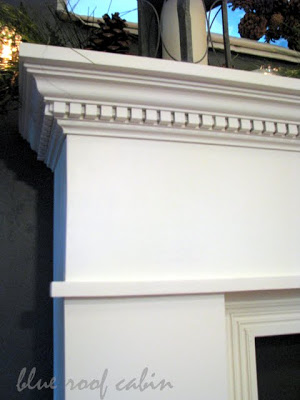
The first thing I did was decide approximately how wide I wanted the mantel to be and then cut the dentil molding first. With this type of molding you need to plan for where the little squares will end up. This way if I made a mistake I could just cut a little more off and make the whole thing smaller. If you used a regular piece of crown molding you wouldn't have to worry about that. Once I had that cut I then had the measurement for the front piece.
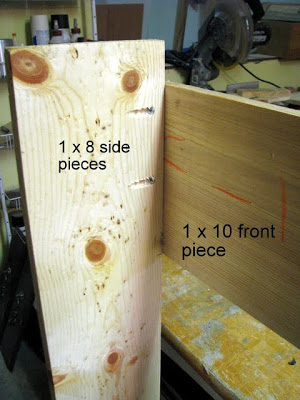
I attached the front piece to the side pieces using my Kreg Jig Jr to make pocket holes. I could have used glue and nails but the pocket holes make it square and tight so that you can move it around without waiting for the glue to dry. You can see I left a gap at the top. The trim covers it and I liked the proportions better this way.
Next I cut a notch in a 1 x 6 so that it would stabilize the sides and also stick out a bit beyond the front piece. I attached it with glue and my nail gun.
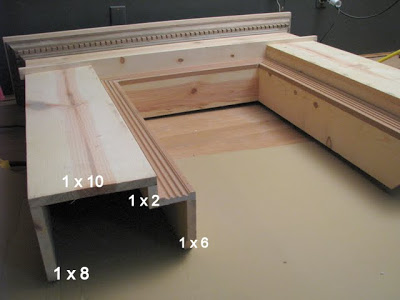
Then I flipped this over and set it on top of a of 1 x 12 top piece. I screwed the sides to the top using pocket holes again and glued and nailed the molding on.
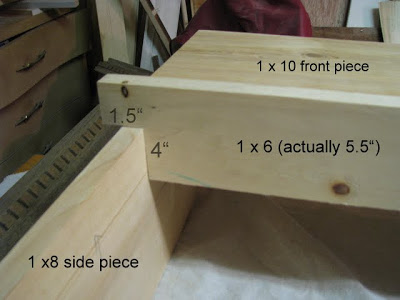
The 1 x 10 is glued and screwed with pocket holes to the 1 x 8. The rest are attached with glue and nails. For the 1 x 2 & 1 x 6 shown above I actually ripped a 1 x 8 board to make the 2 boards. I did this because a 1 x 8 board actually measures 7.25", a 1 x 6 is 5.5" and a 1 x 2 is 1.5" and I needed it to equal 7.25". (does that make sense?)
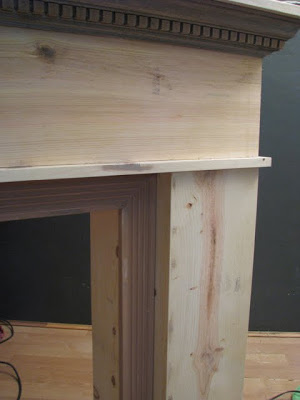
I decided to set the fluted trim back a couple inches to give it a little interest.
I used 1 x 8 and some molding from my stash to make the beefy bottom trim.
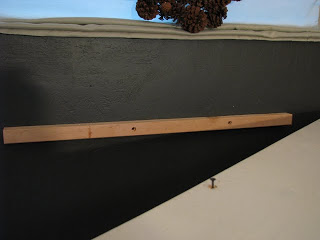
To attach it to the wall I screwed a 2 x 2 into studs then screwed through the top into the 2 x 2. It makes it very stable
.
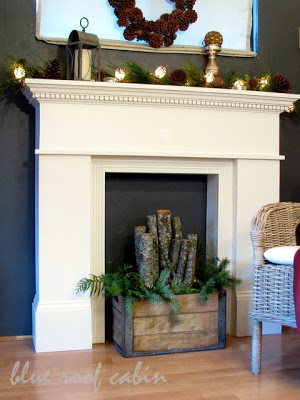
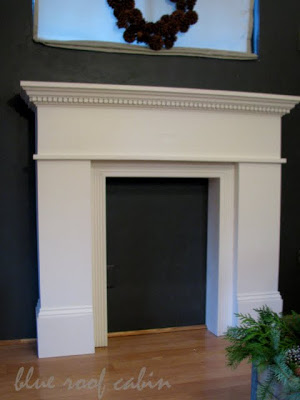
The inside just in case you wanna see it.

Here's how the measurements came out. When you start the way I did you get some pretty random measurements.

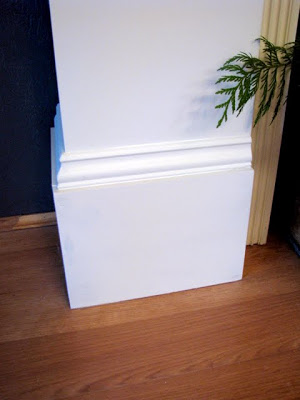
I really love it. Total cost for wood including trim was less than $40. It pays to go to the Restore every week now doesn't it. The paint I had. I definitely had to putty a lot of knot holes and seams since I used pine and do some sanding. I can't believe how many knots were in the boards I picked, what was I thinking?
Oh all the mantel decorating I can do now. I just need to figure out what to do about that window above it. I may cover it with shutters, maybe a mirror or DIY art piece. Problem is it has a twin just to the left of it above the monster TV who shall never be seen on the blog. For now I'm happy with it.
Thanks for stopping by!
