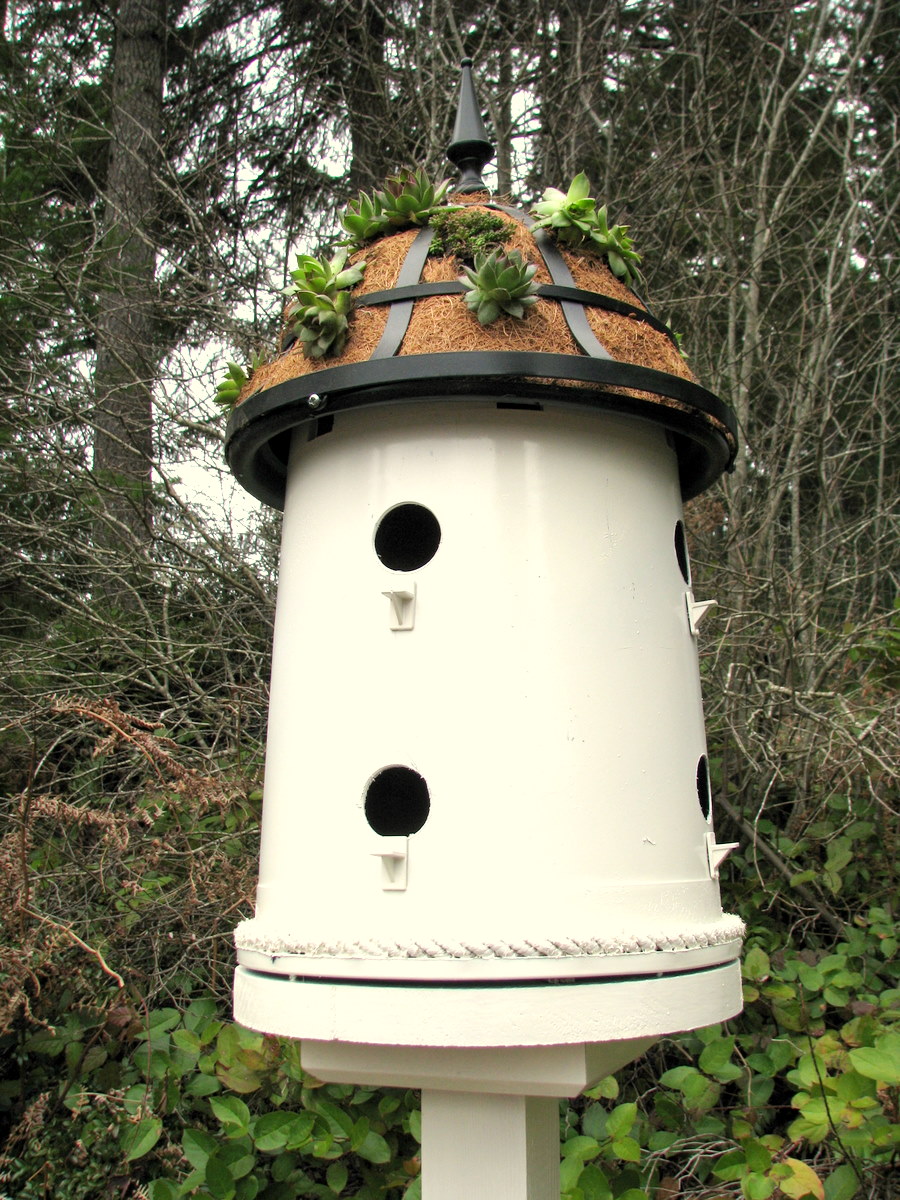
It's finally Spring I am so excited! I cant wait to get outside and play! So here's what I've been up to, I built a birdhouse. Bird Condo really, it has 8 rooms. Oh wait maybe a bird apartment complex would be a better description. No I like Condo. I have no idea why I made a Bird Condo other than I saw a picture of one and thought I would really like a round one but how would I make that? Oh wait a bucket is round......
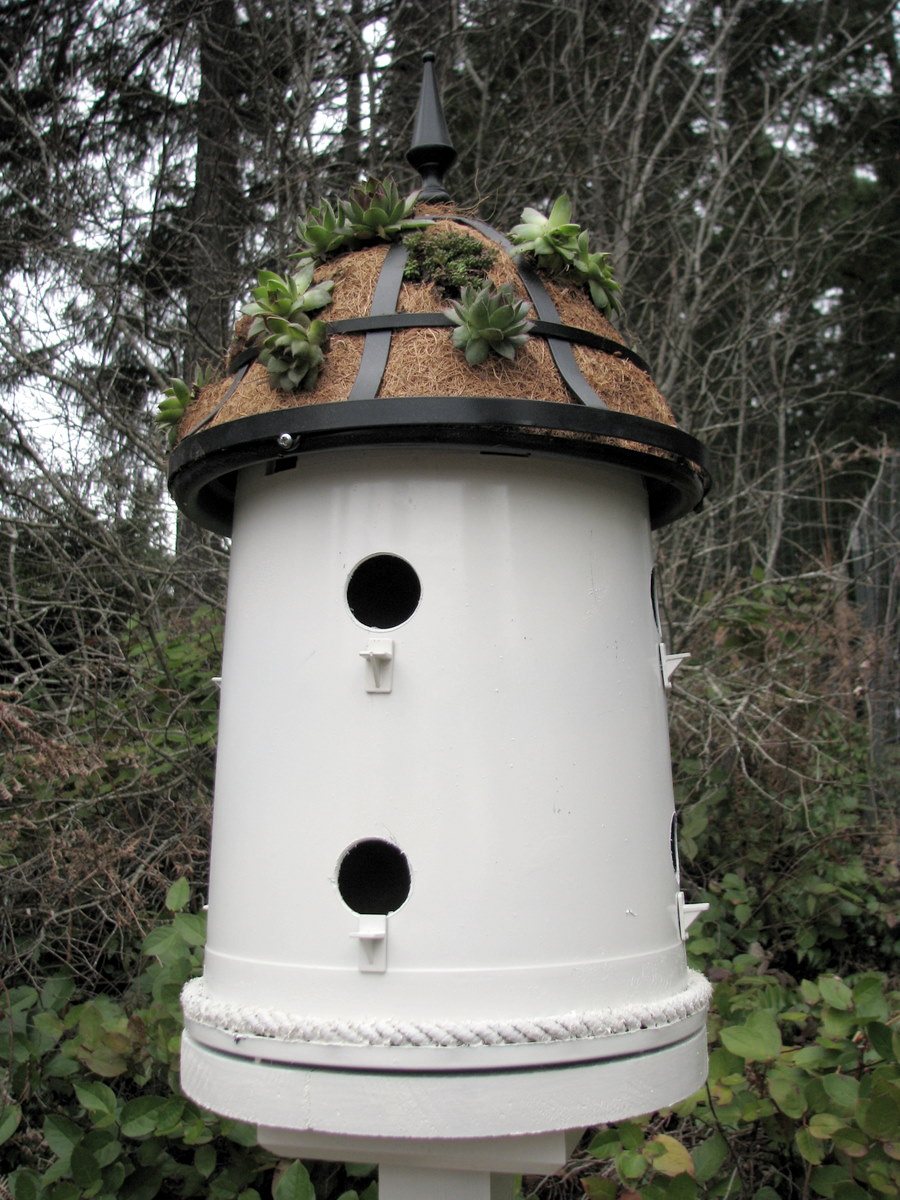
I have plans for a new garden area and I think this baby will go nicely there. I have no idea if birds will find it appealing or not but I hope they do.
I planted the roof with hen & chicks and some other succulent type plant that I have around the yard. I love to garden but I never remember the names of things.
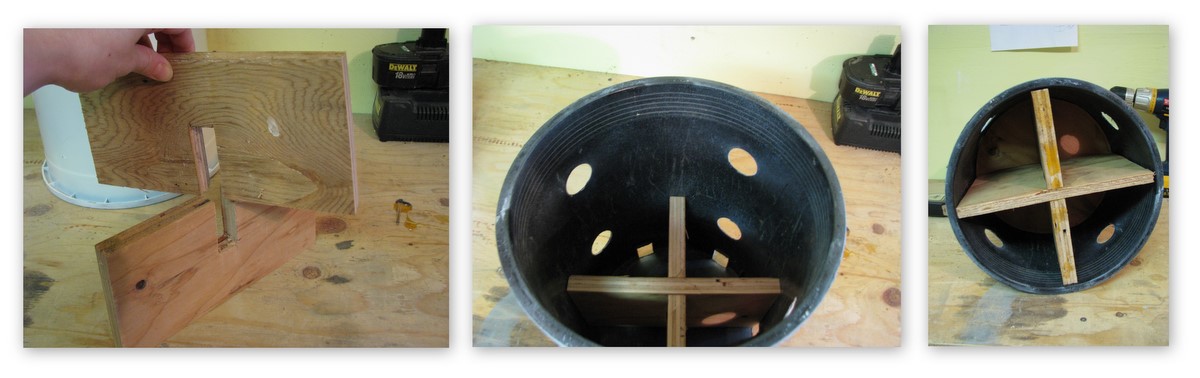
Here's how I did it. I had one of those black plastic buckets that you get when you buy large plants lying around that was the perfect size. The bottom of the bucket measures 9” and the top opening is 10” so it tapers. (I think a bucket that doesn’t taper would be better but I didn’t have one of those)
Here's how I did it.
to make the holes:
- figure out where you want your holes for the "doors" I used the square drainage holes on the bucket to line them up, 8 holes total (I made the first two then put a piece of paper inside and traced those holes to make a template for the rest)
-use a 3/16" drill bit to screw thru the center of the template holes this creates a place for your hole saw to start if you have the kind like mine with the drill bit in the middle.
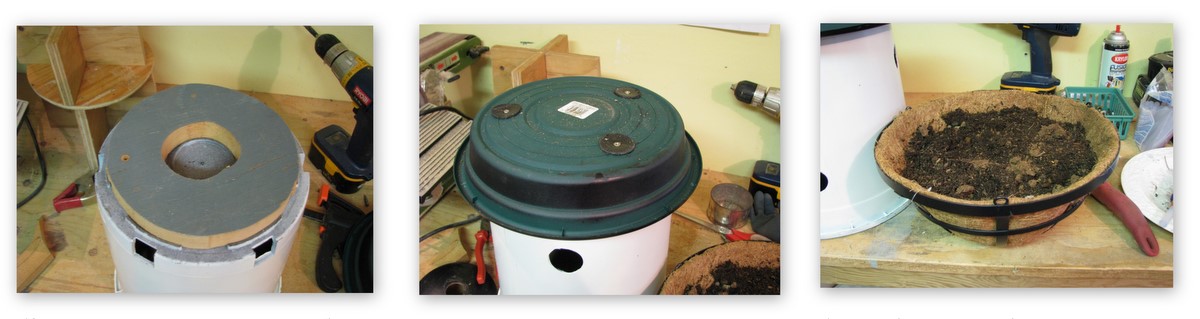
To make the “condos”
-cut 2 pieces from 1x6 board that taper from 9” to 9.5” to fit snug in the bucket
-cut a channel in each and fit together like an +
-cut a circle with a 9.5” diameter and place on top
-make another + measure from the circle to the top of bucket to determine height) set on top of circle
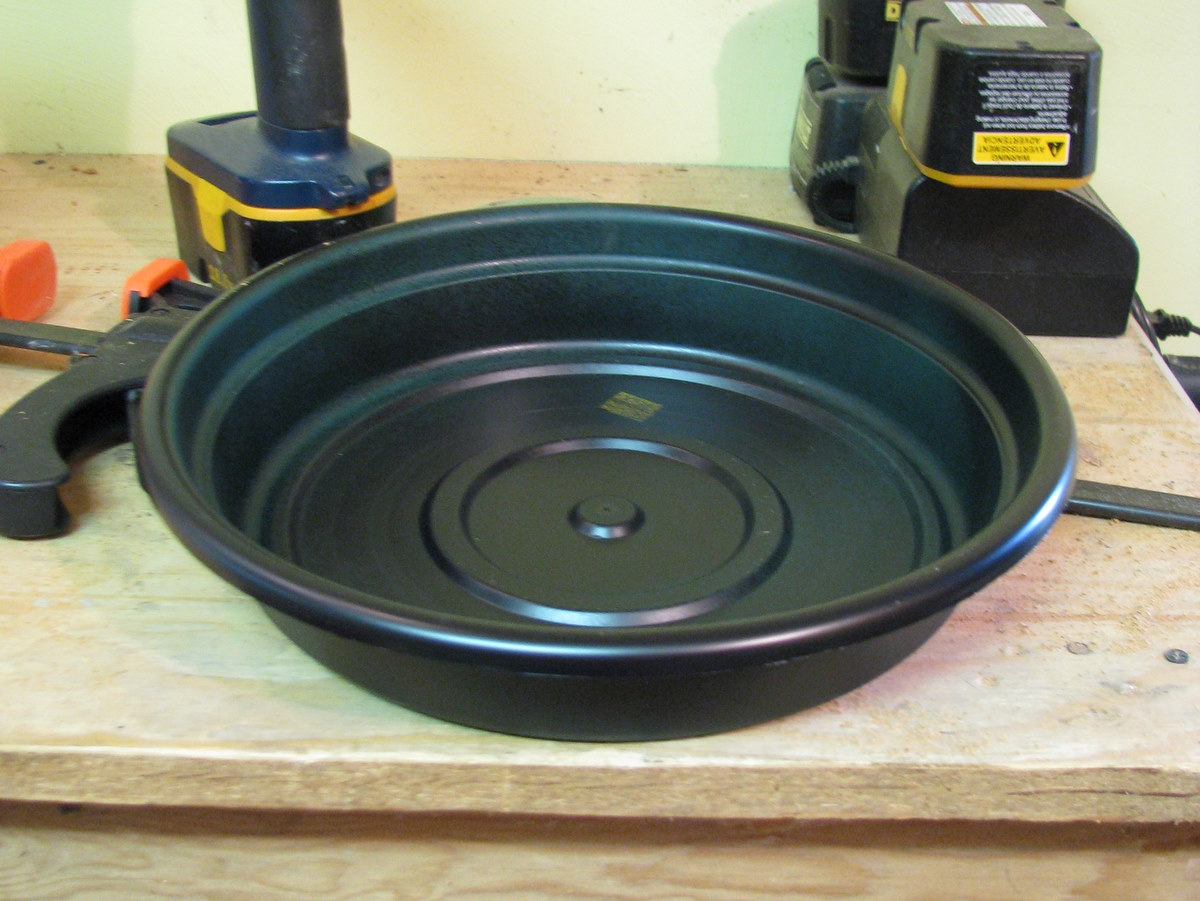
I thought I was going to find a plastic pot that would work for the roof but nothing quite fit or they were too fancy. Then I saw this metal frame basket with a coco liner in it.
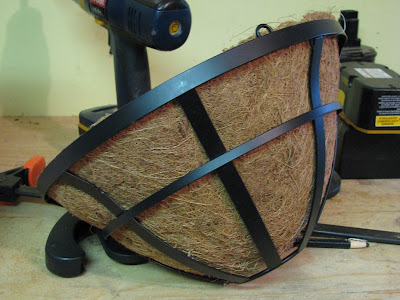
I liked the shape but thought at first it wouldn’t work because it wasn’t water proof but then it dawned on me, I could put dirt in there and plant it and have a living roof! SWEET! I went on the hunt for something that would work to hold the dirt in. The basket opening is 12". I found a plastic tray you know the kind that goes under a garden pot and it was the perfect size. I spray painted the rim black.
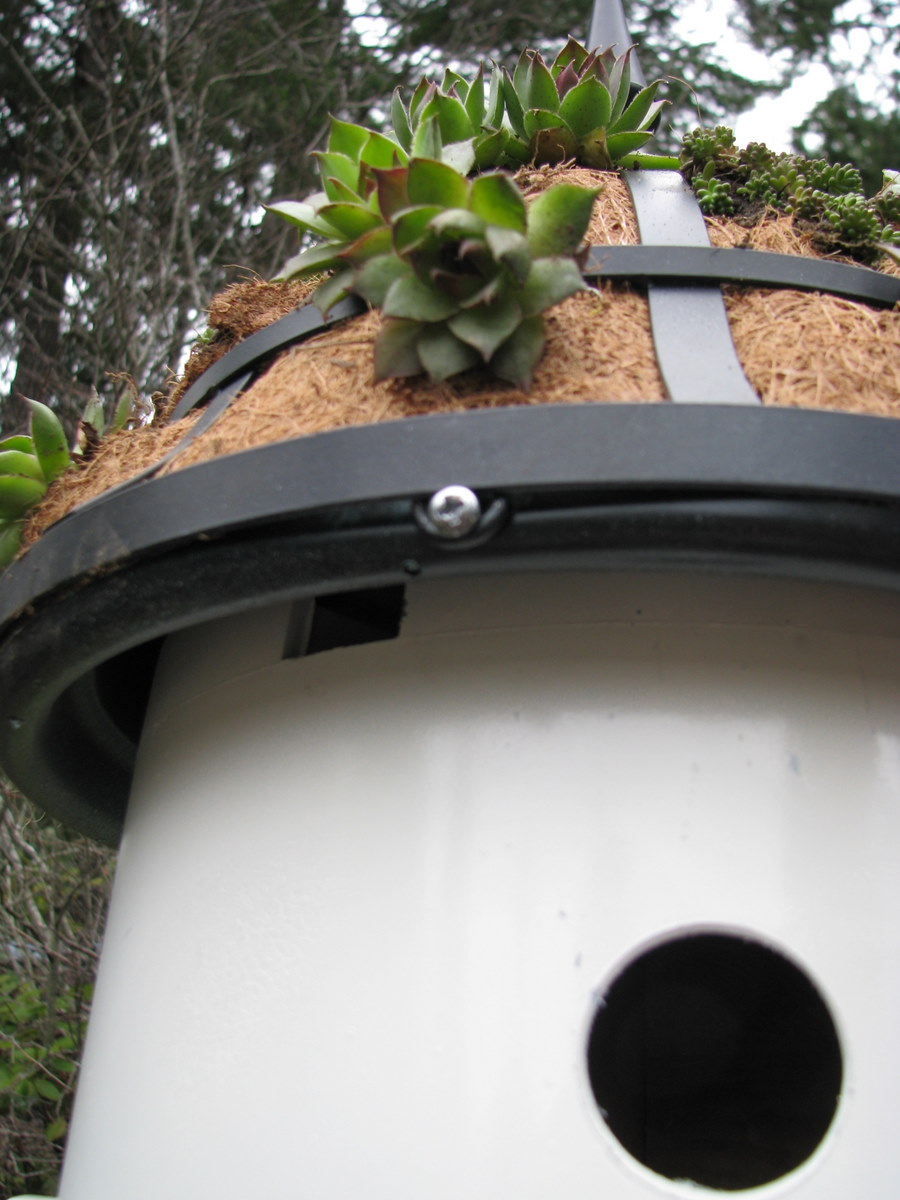
To attach the roof:
-Cut a wood circle to use as a spacer to get the right height and stabilize it.
-screw the spacer to the bucket from the inside of the bucket.
-center plastic tray on top and screw that to the spacer
-use washers so the screws don’t pull through I used the holes I had cut when I made the "doors" for the condos. They were all over the shop floor because I am messy when I work and when I was searching for washers I saw them. ;)
-drill some small holes in the rim of the tray to allow water to drain
-fill the pot with dirt and using hot glue attach the rim of the coco liner to the tray.
-screw through the rings on the frame of the roof to attach to tray. (these rings were for the metal chain that normal hangs it)
For the bottom and stand:
-use the bucket to trace a circle onto wood, cut out w/ jig saw
-screw wood decorative trim piece to circle & screw post in
-trim out the bottom with rope
Do you recognize what I used for my little perches? They are plastic shelf brackets. I drilled a hole and popped them in. A little glue keeps them in place.
I primed and painted the base then screwed it to the metal bracket in a concrete block. Of course if you don’t have a decorative post and trim piece in your stash you could always use a plain 4x4 and some scraps of wood.
-screw through the bucket rim into wood bottom
There is a gap at the bottom where it meets the base but lets just pretend I did that for ventilation. It’s not perfect but good enough for me.
The last step was to cut holes in the coco liner and plant the top.
what I purchased:
Square wood trim piece-$1 from Habitat Restore
Decorative post-$5 from Habitat Restore
12" wide metal coco basket -$7 from Walmart
The rest I had lying around. I never get rid of anything. It's a sickness.
It cost me under $15 but even if I had to buy everything it still would have been pretty reasonable. I love projects like this where you just use what you have and design as you go. I am pretty happy with how it turned out and I am dying to see if the birdies will like it.
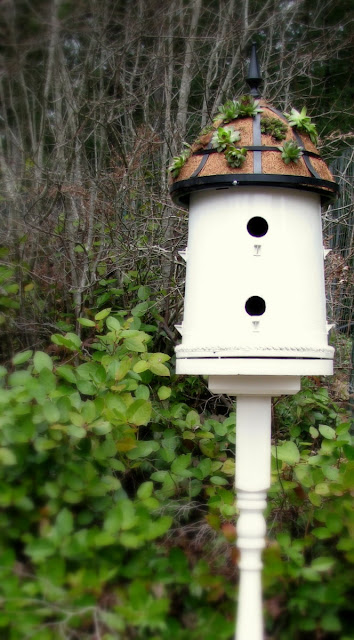
Happy Spring!


That is one cute bird complex! I love how you did this! Very very creative! The addition of the plants on top was very smart! You are going to have some happy birds!
ReplyDeleteThanks for sharing the tutorial!
:)Michelle
Oh my...it is amazing.Thanks for the original idea!
ReplyDeleteMichelle your simply amazing!!! Your crafts woman ship is such a gift, love you.
ReplyDeleteHoly Cow that is awesome! I love the living roof, such a great touch. FYI I am SOOO jealous. It is currently 27 degrees and hailing outside:( So sad...
ReplyDeleteI would never have guessed that the bird condo started out from a left over bucket. So clever!
ReplyDeleteLove the living roof too. I hope you get some little birds moving in soon.
This is sooooo dang cute...love the idea that you had here. Hop over and share it at my party...hope to see ya there:)
ReplyDeleteBlessings,
Linda
This is such a clever idea. If I was a bird, I would definitely want to call this "home".
ReplyDeleteThat's got to be one of the most clever things i've ever seen. And, it's adorable! I really like the graduated shape... it's as cute as can be, and totally functional!
ReplyDeleteCindy
ADORABLE! This may just have to be a Spring project for me to do. Thanks so much for sharing! Marcia
ReplyDeleteYou NEVER cease to amaze me!!! I absolutely LOVE it!! I am so making one of these once we get moved!! :-)
ReplyDeletewhat a great project to add to my list! I so appreciate people who come up with brilliant ideas and follow through... I have an entire folder full of wish lists. I believe this will be be on top! But I will spread the word to friends that complete....there's always hope! Stop by and visit me some time at jennsthreegraces blogspot Love your post! Jennifer
ReplyDeleteWhere has your blog been all my life? LOVE this idea!
ReplyDeleteSo cute! I love this idea ...glad you showed it.
ReplyDeleteI too am new to your blog. I'll be back to read more!
Pat
This made my day! What a great idea! Excellent tutorial, precise AND fun instructions. Did I say excellent photos too? Thanks for sharing your fab idea!
ReplyDeleteOh, I love this! Combines two of my favs, gardening and birding! :)
ReplyDeleteThis is fabulous! I'm sharing on my FB page and twitter.
ReplyDeleteBrittany
http://www.prettyhandygirl.com
Seriously, this is so amazing! Thanks for sharing the how to!
ReplyDeleteI love this idea, you are so creative! Sharing on FB, thanks for linking up to the party!
ReplyDeletexo
Kate
This is the cutest thing ever! I hope the birdies do like it. I sure do!
ReplyDeleteThis is lovely. Hope to see you at My Dream Canvas!
ReplyDeleteFabulous idea
ReplyDeleteI am your newest follower
xo
Pam
Hi Mimi,
ReplyDeleteThis is absolutely adorable! I do have some bird safety concerns though. This structure appears to be lacking a second story floor. How would the birds make a nest if they entered from the top holes? Plus, that's a big drop from the top holes to the bottom if there is no floor. Also, birds are not good vertical (straight up) flyers. Is the bottom floor situated at a good height for the birds to safely get out? What about ventilation and drainage? There are many things to take into consideration when building a bird house. Just want to make sure our feathered friends stay safe! Here's a link that may help.
http://birding.about.com/od/birdhouses/a/housesafety.htm
A fellow bird lover,
Evelyn in Mi.
PS: If this structure turns out not to be bird safe, you could always put mesh around the holes so birds can't enter. Then you'll still have a lovely yard decoration!
Great idea, thanks so much for sharing!!
ReplyDeleteEvelyn, this is in response to your concerns, I definitely thought a lot about the safety of my little birdies while designing. I did research on-line regarding hole size and placement.
ReplyDeleteIn my tutorial in the section "to make the condos" I mention that I cut a circle and put it in between the two wall structures this makes the "floor" of the top condo.
I have a small bird house that I made a few years back with same hole size and similar floor to hole ratios and last spring I had a bird momma and babies living there ;) So I am confident this condo will be safe and I will definately be monitoring it, probably daily ;) I hope this addresses any concerns you may have.
-Mimi
Mimi! I love birds, and I adore your birdhouse. I think it is great that it is tapered! Love the living roof too.
ReplyDelete"catching" you this week at CCC
gail
So so clever! Im going to share this with my readers today.
ReplyDeleteWonderful job! It turned out great and I can't wait to hear if the birds like it!
ReplyDeleteThat is just too friggin' awesome!! I'm totally going to try something like this (I say "like this" cuz I'm sure it won't be as great as yours). Love it!! I'm a new follower now!! Visit me when you have a chance over at Southern Comforts. Have an awesome day!
ReplyDeleteyour inspiration inspired hubby and i to make one of these together. i just have to paint it and find a finial for the top, hopefully will be finished on the weekend. thank for a great blog post.
ReplyDeletenicole
{a new reader to your blog}
http://sweetseasons.typepad.com
So glad I found your blog...love the bird house idea and will be making my own soon!! I'm now following! Best, Vicki
ReplyDeleteOh, look at that charming bird house! The idea of using a bucket as its roof is creative and eco-friendly.
ReplyDeleteBrendan Gertner
I always loved the looked of the bird "hotel" but they are so expensive...your creation is affordable and functional.love it! thanks for sharing
ReplyDeleteThis is an amazing project that looks so pretty !
ReplyDeleteWood you mind if I link up to you so other bloggers can see how gorgeous a birdhouse can look from a bucket ? LOL
Joy : )
This is just the cutest little bird house with a green roof that I have ever seen!
ReplyDeleteHow cool!! Oh my... I would NEVER have taken a 2nd look at those black pots! I will now. :) And that roof is one sweet idea!!
ReplyDeleteShared on FJI Facebook and pinned for SNS 133. :)
https://www.facebook.com/photo.php?fbid=10150911569941141&set=a.192514281140.164586.175378011140&type=1&theater
Donna
I love your birdhouse - very cool! I have this linked to my birdhouses post as well today, for inspiration!
ReplyDeleteVery creative! Keep those creative juices flowing! I love your ideas. Thanks for sharing! <3
ReplyDeleteI love this project and I love your blog... I'm your newest follower...
ReplyDeleteI also love to build things, I'll have to put your birdhouse on my to do list this summer :)
Stop by
Susan
Homeroad.net
Simply awesome creative thinking for an up cycle for all those planters! LOVE IT and making quite a few of these - thanks for sharing!
ReplyDeleteJoAnn
sweetpepperrose.blogspot.com
This is the coolest thing every - pinning it! The birds must flock to your yard!
ReplyDeleteKelly
Might have to try this project this summer! Love it! Did any birds nest in it?
ReplyDeleteThis is simply awesome! Pinning! I am your newest follower :)
ReplyDeleteI would love for you to share this at Give Me the Goods:
http://www.marriedfiling-jointly.com/2013/04/give-me-goods-link-party-5.html
This is great - love the condo! Am hoping that some birdies have made it their home! I have the same sickness {keeping stuff around} - you just never know when creativity will strike and you could use something! Thanks for posting - will definitely be trying this out -
ReplyDelete