DIY Diamond Tufted Head Board

What can I say, I'm obsessed with diamond button tufting. Still. I know it takes a long time and I cant always justify the time it takes but I don't care I like doing it. Which even I find odd. Anywho this is my latest creation.

Sorta Frenchy No? I have posted another tutorial on diamond tufting a sofa but I decided to go ahead and go over it again. I have learned a lot and this is a headboard not a sofa, right?

When I saw this headboard I knew I had to upholster it. Just had to. I decided the panels in the center would get in the way so I removed them. In retrospect I probably could have just left them.
Next I played around with button placement by laying nickels on the headboard. Once I found the look I wanted I measured everything out and marked with a sharpie. I drilled a 1/4 inch hole everywhere a button needed to be.
I decided to make a template to help with cutting the foam. I used wrapping paper and once it was cut I poked a hole through the paper where all the holes were. I used a sharpie to trace the shape onto two layers of 1 inch foam. I was able to cut it with scissors. On the top layer I re-cut the edges at a 45 degree angle to soften them. Once the foam was cut I attached it to my headboard with staples.
Here's why I poked holes in my template. Now I could lay it on top of the foam (cant see the holes through foam) to find the holes. I could have poked a needle through the back but this seemed easier to me.

I cut holes in the foam using a roughly cut piece of conduit. Twist the pipe back and forth and it will cut through the foam. This is how you get the deep tufting, you need holes for the buttons to go into. A little bigger then you button is best. I chose 3/4" buttons of this project I like the smaller size. Then I covered with batting and stapled that on.
So now comes the fun part. Diamond tufts. I fully admit it takes some practice. There are tons of tutorials out there and I've read and watched lots. I will link to some of my favorites at the bottom of this post.
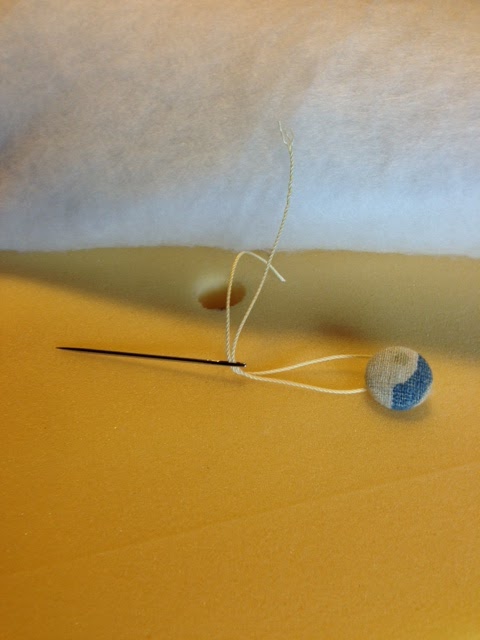
The way that works best for me is to start in the center of my project and attach that button. Thread you needle like shown above and put it through the hole. Longer string and needle then shown would be easier. And obviously you would have your fabric and batting over the foam, not the best photo but you get the idea.
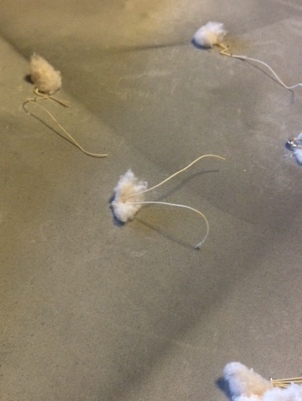
I use a little piece of cotton batting to hold my knots but you can also use buttons or rings or soda can tabs whatever you have. I tie them in a slip knot so that I can re-tighten them at the end.

Then go to the right and attach that button pulling the fabric as tight as I can and making sure the fabric is straight. Next do the button above those two buttons. Start by finding the center of the fabric between the two buttons then follow the weave of the fabric up to the above hole. This will cause the extra fabric to start to show you how it needs to fold. Continue on in this pattern. Just know that you inevitably will have to re-do a couple of your buttons. This is why you don't want to tie a permanent knot until the end. At the end of this project I undid my slip knots and pulled the cotton out then stapled the strings to the back of the board.

Next I stapled the fabric in place and covered with double cord welting.

When I was all finished I lightly pressed the folds with an iron, after all the pulling it needed it. Make sure you test on a scrap of fabric before you go ironing yours. It also kinda fused the batting to the fabric a little which helps everything stay crisp.

Here she is in the shop all ready to find her forever home. I also recently re-upholstered those two chairs. I love the carved detail. I'm in a Frenchy mood I guess.
Here's some links I found helpful, happy tufting. Or if you prefer you can just live your diamond tufting vicariously through me ;)
-Awesome Video from Kim's Upholstery
If you follow me on facebook you know this already but if not I will tell you some exciting news. I am now selling my pieces at two locations. The first is where I've happily had my space for the last year, Abundance Vintage in Centralia WA. The second is Poppy & Co. in Tacoma. They are about an hour apart and each have their own unique vibe. I am so thankful to be able to work with such talented ladies. If you would have told me two years ago I'd be selling my projects in two fabulous shoppes I would not have believed it. What an amazing journey I've been on.
Wanna see just how fabulous each store is check them out on facebook Abundance Vintage , Poppy & Co., & my page just in case you haven't liked it already Blue Roof Cabin.

linking up to:
Savvy Southern Style - Wow Us Wednesdays
Miss Mustard Seed -Furniture Feature Friday