Update a Builder Grade Kitchen with a DIY Custom Cabinet
I have been on a quest to upgrade my kitchen for years now. I call it a quest because well you know these things take time. My kitchen cabinets are a builder grade maple. Maybe they are a notch above builder grade I don't know but they are not very fancy. My goal is to add some character to this kitchen. I decided to add a custom cabinet to my builder grade kitchen.
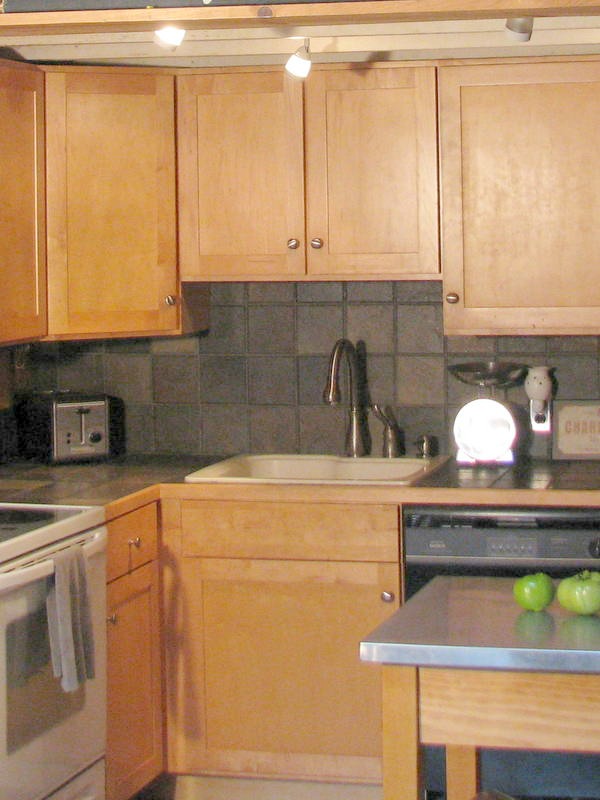
Here's the before. Dark ceramic slate looking tile back splash and counter with standard 30" cabinet above the sink. The ceiling is very low because the kitchen is part of the original log cabin our house was built around. It was dark. I thought about just removing the doors on the old cabinet and adding brackets underneath but I didn't like the center support brace in the middle of it. I thought about cutting it out but then decided against ruining the cabinet. Why not just build exactly what I want? My next step is to replace the counter top, purchase a new sink and eventually paint the cabinets. The mismatched appliances work fine so they will just have to stay for awhile.

Thankfully the tile came off pretty easily. I installed the tung and groove using a nail gun nailing into the groove side so the holes aren't visible. Only one outlet so it was pretty easy. I primed with oil based primer before installing.
I painted with two coats of semigloss white (Oyster White by Glidden from Walmart.) It really brightens up the place. I know it seems weird to replace the back splash before the counter but I wanted the back splash to go behind my new cabinet. I left a gap between the counter and the bottom of the boards so hopefully there wont be much damage when we pull the counter out. I plan to use either quarter round or some sort of trim to finish it off anyways which will cover the gap. (the trim is just sitting there for now for the photo shoot.)
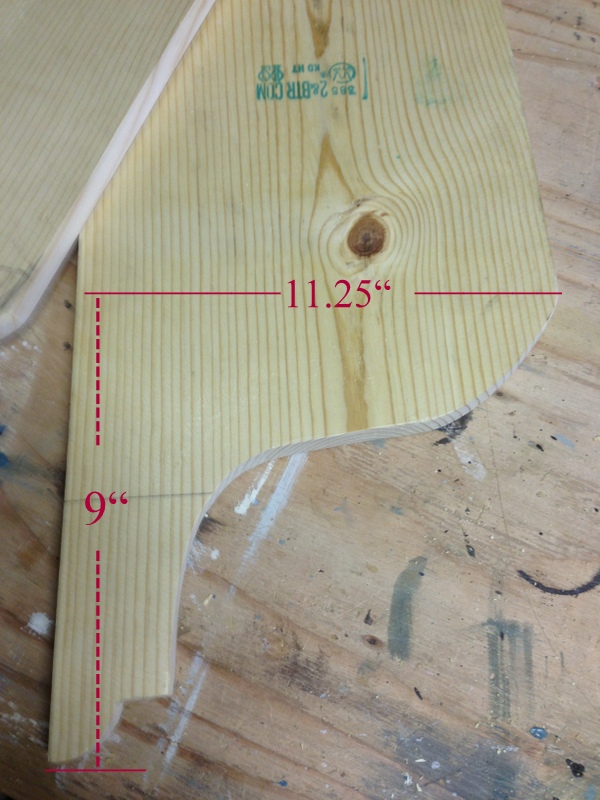
To build the cabinet I used two 1 x 12 x 34" pine boards for the sides. (Keep in mind 1 x 12 pine is actually 11.25" wide) The bottom 9" I cut out a decorative bracket shape. That was the hardest part deciding on that shape.

Total cabinet width is 30" so I cut a 1 x 12 x 28.5" board for the bottom shelf and glued and screwed it to the sides.
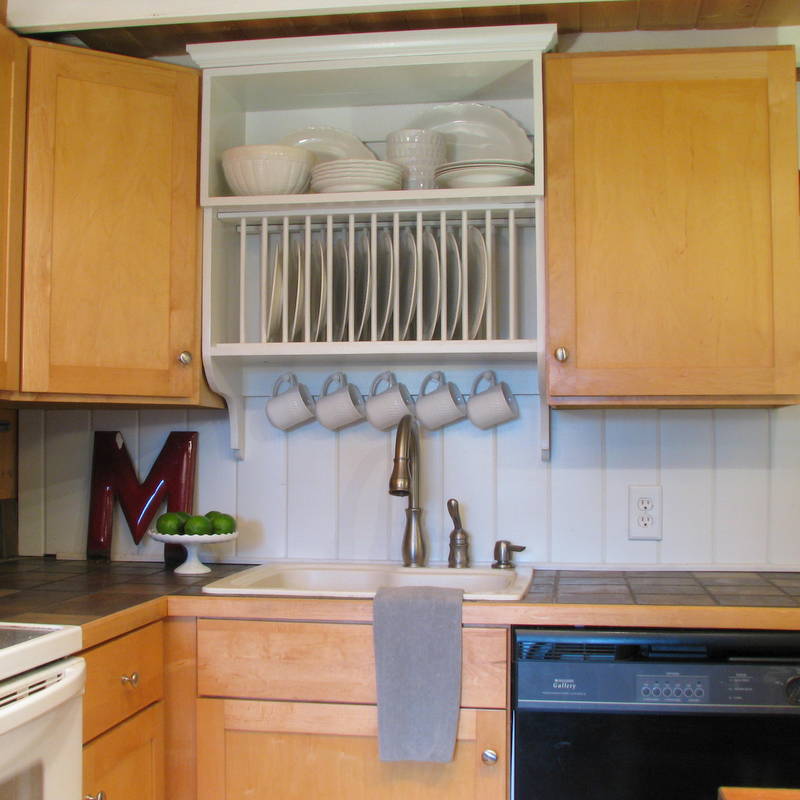
Then I stopped taking pictures for some unknown reason. So I will attempt to show the rest by typing all over the finished picture.

I wanted the top portion of the cabinet to be deeper than the lower plate rack section to make the cabinet look more interesting and custom. To achieve this I glued and nailed a 1 x 2 x 12" piece to the 1 x 12 sides. Then to make the shelf the right depth I added a 1 x 2 to the back of it. That way the seam was in the back so the constant sliding of plates wont bother it.
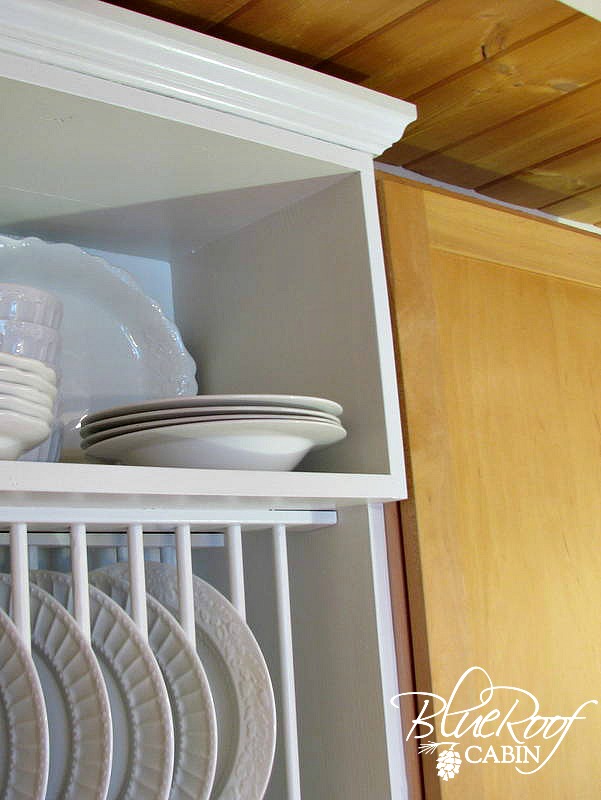
For the top of the cabinet ideally I would have used a 1 x 12 and a 1 x 2 like the shelf but I didn't have anymore 1 x 12 so I used what I had. I added a 1 x 4 to the top back so that I would have something solid to screw through to mount it to the wall. Underneath the bottom shelf I added a 1 x 4 and drilled holes for the pegs. I finished it off with 1/4" plywood on the back.


I didn't think I was going to add crown molding but when I installed the cabinet it looked plain. (the before looks bald kinda doesn't it?) I do love me some crown.

I made a little crown molding hat for the cabinet that sits on top. I haven't nailed it in yet because I eventually want to paint the ceiling. Once I do that I will attach it and caulk the seam. There is a beam above the cabinet so the sides don't go all the way back.
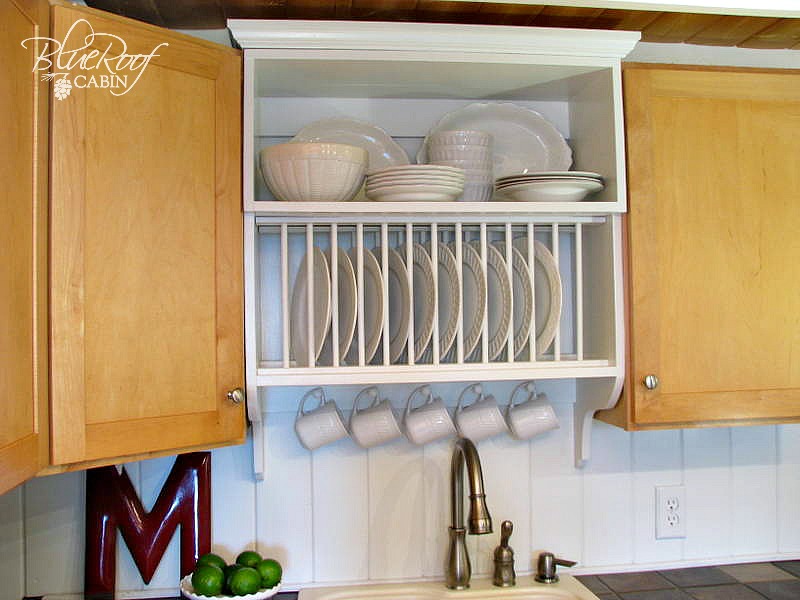
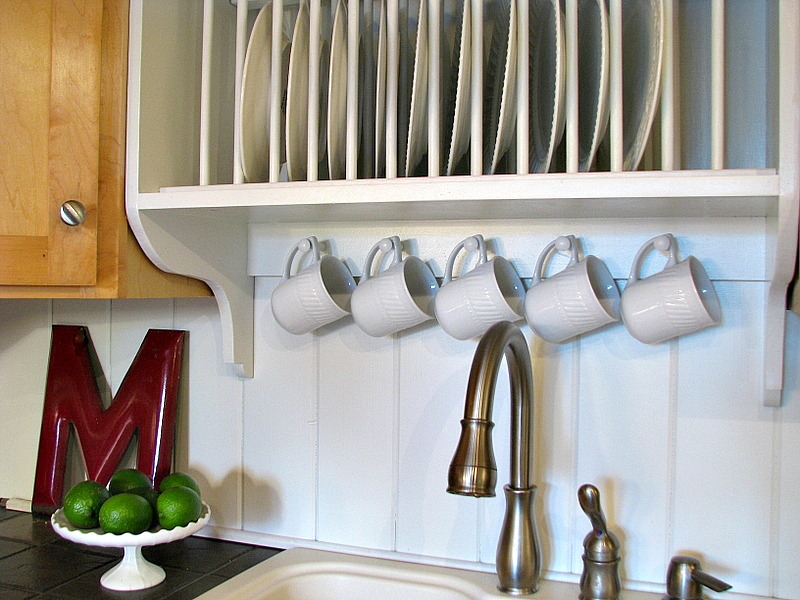
The plate rack I built just like I did my old plate rack click here for a tutorial. If you are wondering if I have two plate racks now the answer is no. I took the other one out of the other cabinet and used the dowels for this one. I really like having a plate rack it is very functional and I love the way they look.

I am really happy with the change the back splash and new Cabinet have made to the kitchen. It is closer to the cottagey kitchen look I am going for. I almost don't mind the yellowed maple cabinets anymore. Almost. I will be able to live with them a little longer. Next up installing the garage sale granite I picked up almost two years ago. Man time flies.

Playing at the following Parties
Farm House Porch - The Scoop
Coastal Charm - Nifty Thrifty Tuesday
Knick of Time Interiors - Knick of Time Tuesday
Savvy Southern Style - Wow us Wednesdays
Coastal Charm - Nifty Thrifty Tuesday
Knick of Time Interiors - Knick of Time Tuesday
Savvy Southern Style - Wow us Wednesdays
Primp - Primp Your Stuff Wednesday
Full Circle Creations - All Star Block Party
My Romantic Home - Show and Tell Friday
My Repurposed Life - Catch as Catch Can
French Country Cottage - Feathered Nest Friday
Funky Junk Interiors - SNS
Miss Mustard Seed - Furniture Feature Friday
Common Ground - Be Inspired Friday
Alderberry Hill - Make the Scene Monday
Elizabeth and Co - Be Inspired
