Beadboard Cupboard
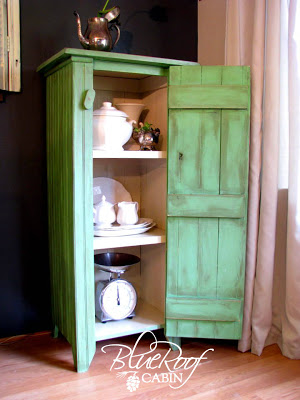
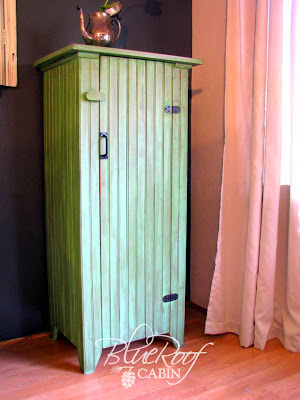
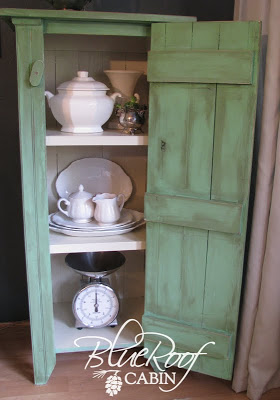
And I shall call him Kermi. I don't normally name my projects, but once in awhile I do if they speak to me. This guy wanted to be called Kermi (as in Kermit the frog ya know, cause he's green.) I love this color green. It's so springy.

(see my new silver teapot? It is perfectly tarnished. sigh.)
A month or so ago, when I went shopping for research, I noticed several old bead board cabinets in antique stores. I really like the look of them. I was inspired to build one. I have a stash of bead board that my in-laws gave me when they moved out of state (miss them) and I decided to stop hoarding it and put it to good use. I can always get more right?
The bead board comes in 5/8" thick boards. For the sides I glued five boards together and braced them with 1 x 3's by gluing and nailing. Those braces then support the shelves on the inside.
For the back I just used 1 x 4's because from the inside the bead board looks like a regular 1 x 4.
Same thing for the door except I used 1 x 4's to brace it. I made sure they didn't line up with the shelves so the door would close.

For the shelves I used scraps of plywood that I cut to size with my table saw. I faced them with 1 x 2 pine to make them look more substantial.
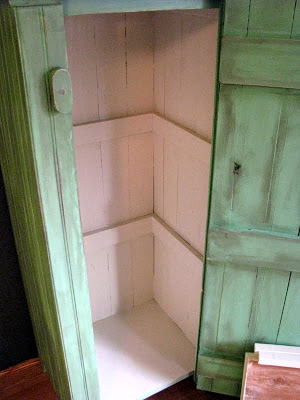
I had to do some ripping with the table saw for the corners to match up. I didn't miter them I just butted them together and attached with pocket holes & glue on the inside. (I made sure to place the the pocket holes so they would be covered by the 1 x 3 shelf supports so I didn't have to fill the holes) The dotted line is where the corner pieces met up.

This next picture you can see where it didn't meet up perfectly on the top part of the other side. No problem it's rustic right?
I had to do some ripping with the table saw for the corners to match up. I didn't miter them I just butted them together and attached with pocket holes & glue on the inside. (I made sure to place the the pocket holes so they would be covered by the 1 x 3 shelf supports so I didn't have to fill the holes) The dotted line is where the corner pieces met up.
This next picture you can see where it didn't meet up perfectly on the top part of the other side. No problem it's rustic right?
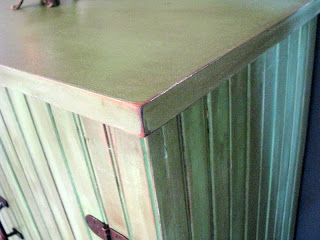
For the finish I painted with flat latex paint the color is called Resplendent Fern Green from Walmart. I sanded to distress, then applied dark oil based stain as a glaze. For the top coat I used wipe on poly in a satin finish. On the inside I used a semigloss cream color that I had in my stash. I like how the lighter color keeps the inside bright.
Sorry this is not a proper how-to post with actual photos of the process but I didn't think I was going to post about it. Then I wanted to. If you have questions let me know.
It will be hard to let Kermi go, we've bonded. Even my husband's been calling him Kermi. Do you get attached to your projects too? Tell me it's not just me. I will be adding him to the shop page just as soon as I'm done looking at him.

P.S. Don't forget to enter the giveaway if you haven't already!
linking up to the following parties:
Savvy Southern Style - Wow Us Wednesdays
Not Just a Housewife
Uncommon Designs Online - Uncommonly Yours
DIY showoff - Project Parade
Home Stories A to Z - Tutorials and Tips