KITCHEN ISLAND FROM A DOOR
I revealed my new kitchen Island a few weeks ago so I thought I'd share how I put it together. Why use a door to make my kitchen island? I purchased the brown door for $20 and I definitely couldn't buy new wood and trim to make panels for that price not to mention the time it would take. Also I love the character of old doors. I am thinking of dedicating all of 2012 on a blog series called 101 projects using old doors. Not really but wouldn't that be fun?

The front of the island uses two of the panels.

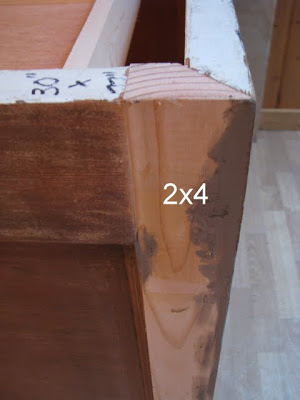
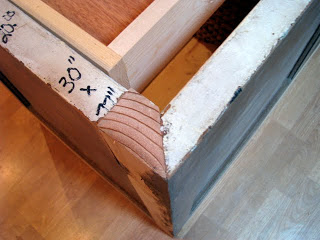
I mitered the corners using a skill saw set at a 45 degree angle. I then glued and nailed them together.
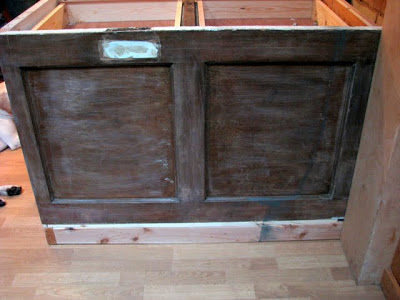
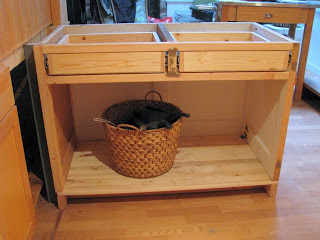
After building the cabinet part I flipped the whole thing upside down and glued and nailed some tung and groove boards to the bottom. I then made a base frame using 2x4's for the whole thing to sit on. The door was only 30" wide so it needed the base to make it counter height.
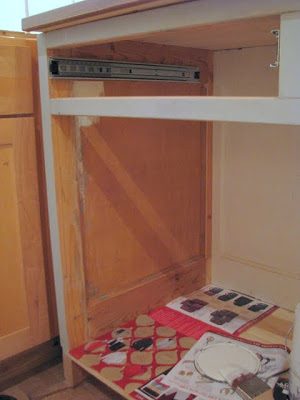
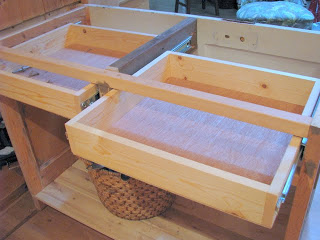
To support the drawers I attached a 2x6 down the middle using pocket holes and used 2x2's across the front to support it. I did a very simple drawer no fancy cuts here just 1 x 4's glued and nailed together with a 1/4" piece of luan glued and nailed to the bottom.
For the drawer fronts I used some old wood that I had lying around. The pulls are from Home depot.
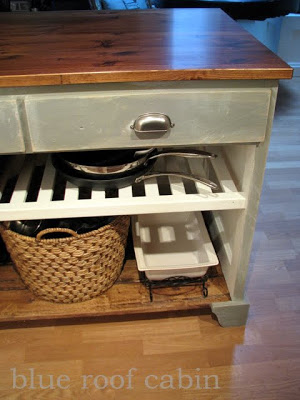
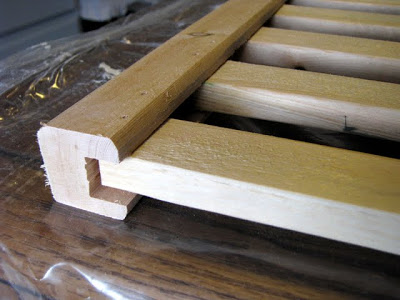
For the shelf I used 2 x 2’s for support and 1 x 2’s for the slats. I used my table saw to cut a channel in the 2 x 2’s so that the 1 x 2’s would fit inside. I had to run each 2 x 2 through the saw 4 times to get a wide enough channel.


I am going to live with the color and see how I feel after all the cabinets are painted white. I am still on the hunt for brackets to finish off the front and support the counter.
So there’s the details of the Island. Whew, glad that project's done!

If you have read my blog for a while you might remember I found these doors back in May. The white one is now my dining room banquette. I was really excited when I found them because I instantly knew what they would become.
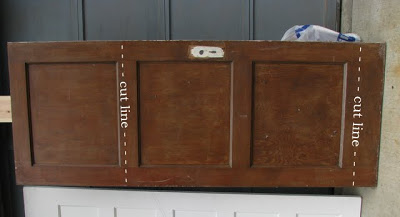
I started by cutting the door with a skill saw.
The front of the island uses two of the panels.
The third panel is used on the side. I had to modify it because of how I cut the front piece. I used my pocket hole jig to screw a 2 x 4 to the panel to make it centered. I did the same thing when making my banquette go here if you want more info on that.
I mitered the corners using a skill saw set at a 45 degree angle. I then glued and nailed them together.
For the other side which is against the wall I ran out of door. Since it would only be visible from the inside I made a faux panel by using a piece of plywood, 1X wood and small cove trim.
After building the cabinet part I flipped the whole thing upside down and glued and nailed some tung and groove boards to the bottom. I then made a base frame using 2x4's for the whole thing to sit on. The door was only 30" wide so it needed the base to make it counter height.
To support the drawers I attached a 2x6 down the middle using pocket holes and used 2x2's across the front to support it. I did a very simple drawer no fancy cuts here just 1 x 4's glued and nailed together with a 1/4" piece of luan glued and nailed to the bottom.
For the drawer fronts I used some old wood that I had lying around. The pulls are from Home depot.
For the shelf I used 2 x 2’s for support and 1 x 2’s for the slats. I used my table saw to cut a channel in the 2 x 2’s so that the 1 x 2’s would fit inside. I had to run each 2 x 2 through the saw 4 times to get a wide enough channel.
It took me 3 weeks to decide on a top. I eventually decided on a desk top from Ikea that is 1” thick and comes in a 30 x 60” slab. It’s okay with me that it is a soft wood because any dings dents will only add to the look I’m going for.
I stained it with a mix of oil based Minwax stains I had on hand. Jacobean, red mahogany and natural. I wanted to match our hutch that is across the room, it’s a family piece that is staying. I finished it off with several coats of Minwax semigloss polyurethane.
For the finish on the island base I first started with Annie Sloan chalk Paint in Paris Gray but it didn’t work with the dining room wall color. Then I ordered a sample of ASCP in French linen which is a very earthy grayish linen color that I really liked. But the sample was not enough & I ran out. At this point I was frustrated and had seen some blogs talking about making their own chalk paint so I mixed my own using non sanded tile grout and a couple grays I already had on hand. Then I distressed the whole thing with sand paper.
I am going to live with the color and see how I feel after all the cabinets are painted white. I am still on the hunt for brackets to finish off the front and support the counter.