The Peggy Chair

I don't normally name my projects but I named this chair after my friend Peggy. Peggy got me this chair for free from her friend that was moving. She said she knew I could do something with it. I just think that was so sweet of her. Shout out to Peggy you are awesome!

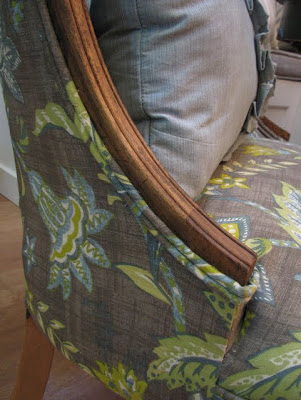
At first I was thinking slipcover but I didn't want to lose the wood detail along the sides or the shape. The fabric was also kinda dingy so it needed to go. I spent several hours here and there removing everything down to the bones. One of the legs needed to be repaired as well. I wasn't sure if I was going to be able to keep the scalloped back or not. In the end I decided to button tuft. Here's a readers digest of what I did. I am not an expert so I am just hitting the highlights. I only knew how to reupholster this chair because I took it apart. I did not do things the "right" way but I think it worked out. The biggest thing is to just go for it. Each time I learn and do better the next time.

I decided to go ahead a buy a pneumatic staple gun and it makes a world of difference. I found an inexpensive one on Amazon. The first chair I recovered (found here) I used a hand stapler and I had to pound in every single staple. Never again.

To put her back together I first found some scrap fabric and stapled it to the back of the chair so that I would have something to thread the buttons through and to keep the curved shape. I then added a layer of foam followed by a layer of cotton batting and then regular batting. Then came my fabric.

After deciding on the placement I pulled the buttons through all the layers and knotted them. I did not permanently knot them until I was finished with all of the buttons.
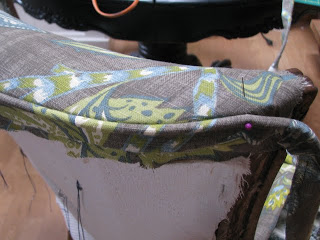
Once the fabric was all pulled tight and stapled I added a strip of piping to the top back of the chair.
When I took the back part of this chair apart I discovered a thin strip of cardboard was used up against the piping. I found a roll of the stuff at Joann Fabrics (it's called upholstery tack strip)for $10 and I totally cheaped out since I only needed less than two yards I didn't want to buy a whole roll. I figured I could find something to use instead. I was looking around for something when I saw this,
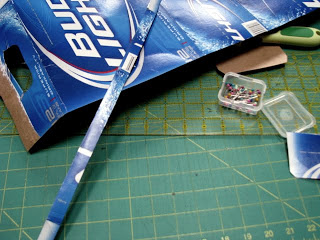
A bud light box is the perfect thickness. Tacky, well yes but hey it worked beautifully. I used my rotary cutter to trim a half inch strip.
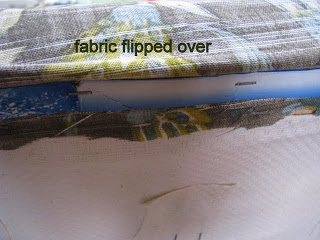
If you push the cardboard up against the piping it gives you a crisp edge once you flip the fabric back over.
The sides of the chair were pretty easy to do since you can hide all the staples with double cord welting. If you don't have the sewing machine attachment to make it here's a tutorial over at Centsational Girl that shows you how to do it.
I used my fancy bud light tack strip on the front of the chair as well.

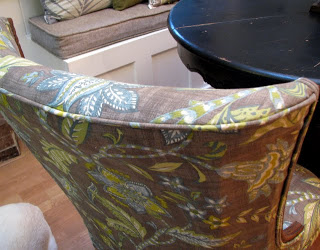
Here she is in the room. My little blue ruffled pillow sure has gotten a lot of miles in my photo shoots.
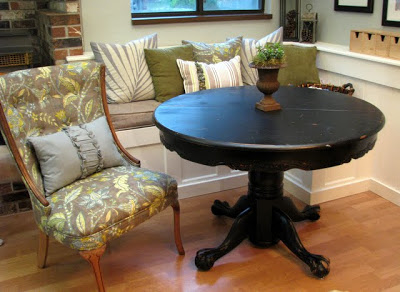
So I am loving Peggy Aka the Chair that was free except I had to buy a pneumatic staple gun, all new cushion and stuffing materials and fabric AND spend 20 hrs removing staples. Actually I didn't have to do any of those things but this chair inspired me. I love her shape and her curved back is so comfortable she kind of wraps in you in a hug when you sit in her.
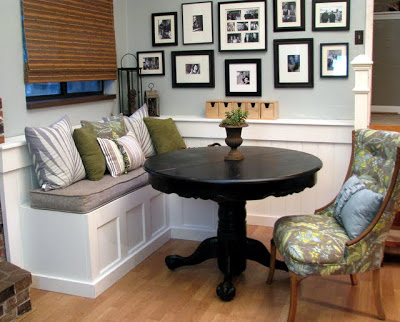
The dining room is coming along it now has Peggy, some new pillows, and I hung a woven wood blind which helps warm up the space now that I painted everything white.
I am glad I finally got a blog worthy project done. I feel like it's been forever since I have had something to post.

Playing at these parties