Salvaged Door into a Dining Room Banquette
I had been thinking about maybe building a kitchen banquette. Then I went to the Habitat re-store and found inspiration. Big time. The kind that hits you and you must fulfill it or you will burst.... I went it a creative frenzy. I had to get out of the store as soon as possible before everyone else that was there decided they had to have them too. Do you ever feel like that when you find something that you consider a treasure? Wait you don't have to answer that I know you do. I was sooo excited, I did a little dance when I got them safely home.
I know right.
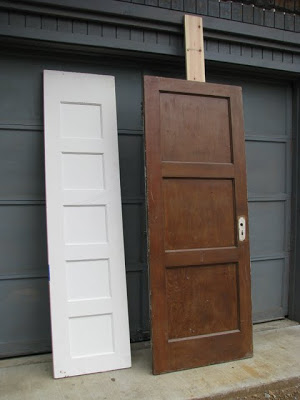
Ok so they are just doors, but not for long. I started with the white one, the brown one I will get to later.
(re-enacted for photo op)
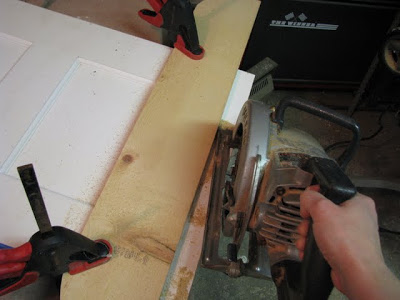
I started by cutting two of the panels off. I clamped a piece of wood to the door so that I had something for the skill saw to follow. Just drawing a line does not work for me. This way I don't have to get down close to the saw to try and follow a pencil line.
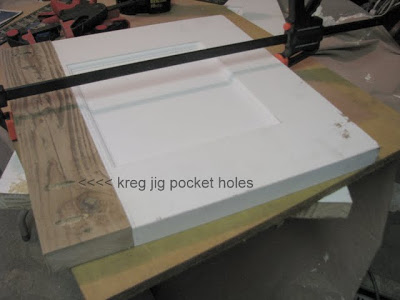
I used my Kreg Jig Jr and glue to attach a piece of 2X6 to the cut end so that the panel was centered. I had to rip the 2x6 down on the table saw to get the right width and take the curved edge off.
I filled the seam with wood filler. Once I sanded and painted it you cant even see the seam. I made two panels this way.
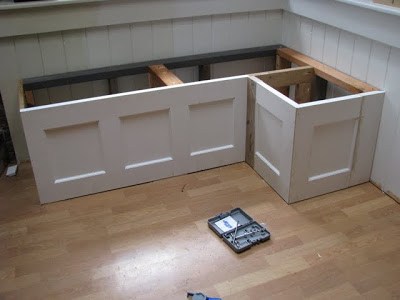
Fast forward to how I put it all together.
Fast forward to how I put it all together.
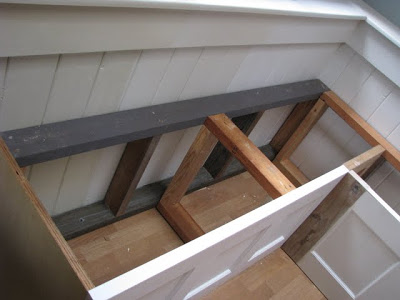
I re-used some 2 X 4's from the shed we tore down to build the support for the backs. I then screwed it the wall. I didn't have enough door to make a panel on this end so I used a piece of plywood. (disregard the three different whites on the wall)
You can see the right side is made up of the two panels I had to modify.
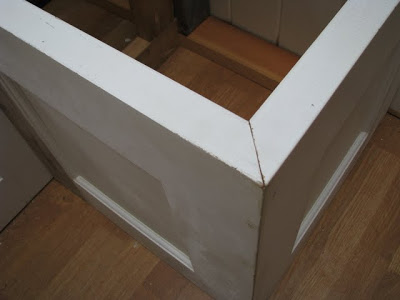
I mitered this corner with my table saw. I used glue and nails to attach the corner and wood putty filled the holes.
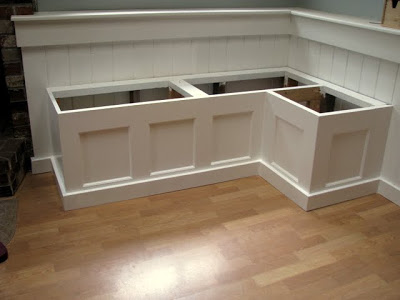
Here it is with the bottom 1x4 trim and a new paint job. I am still not sure about this white, it's so white I may still change it. It's growing on me.
For the top I had intended to use plywood that would overhang about an inch. I cut the piece but once I set it on top it looked awful. The proportions weren't right because of the panels and since I disobeyed the rule of bench height it made it to tall. So I had to change the plan and cut the plywood to fit flush inside.

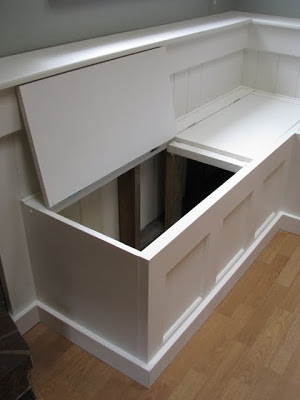
To support the top I screwed 1 x 2's inside along the front and sides. This looks much better and the cushions will cover it all. For the hinges I used basic 2" utility hinges
edited to add: Since I had built the middle support so that it was flush with the front and back I had to remove it and cut it down by 3/4" so that the new top would sit rest on it and be supported by it.
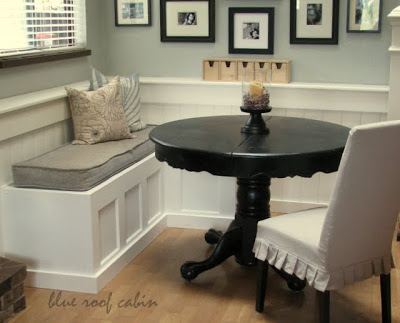
Here's a picture of it with a cushion I had. This is temporary. I wasn't going to post about this until I had an after picture with a finished cushion then I decided why wait.
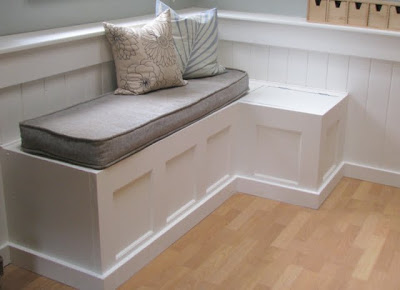
The fabric choice for the cushion and pillows is what has been holding me up. I plan on making two cushions with piping. I also want to try a woven wood blind on the window to warm things up. Once I find fabrics I like I will pull an accent color from them to paint the Ikea wood drawer organizer and an oar I want to hang above the photo gallery. I think.
Thanks for stopping by. So any guesses on what I am planning to use the brown door for?
