I'm Building a Hall Tree for Charity
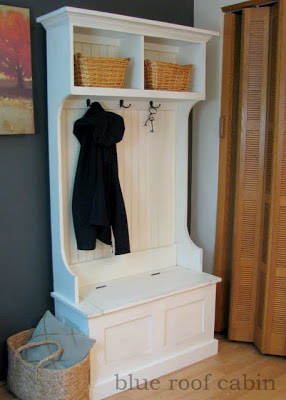
o The last few weekends I have been working on a project that is taking forever. I don't usually post without the after picture but I wanna show you so here it is. In all her unfinished glory.

It's a Hall tree. I am building it to raise money for my Relay for Life team. For those of you not familiar with Relay for Life it is the main volunteer-driven cancer fundraising event of the American Cancer Society. The Relay event is held once a year but Teams raise money all year long. We will be selling raffle tickets for the hall tree and it will be raffled off at the Relay event.
It's a Hall tree. I am building it to raise money for my Relay for Life team. For those of you not familiar with Relay for Life it is the main volunteer-driven cancer fundraising event of the American Cancer Society. The Relay event is held once a year but Teams raise money all year long. We will be selling raffle tickets for the hall tree and it will be raffled off at the Relay event.
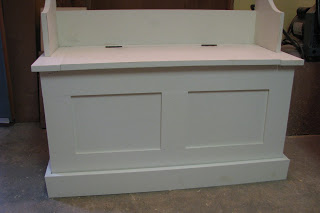
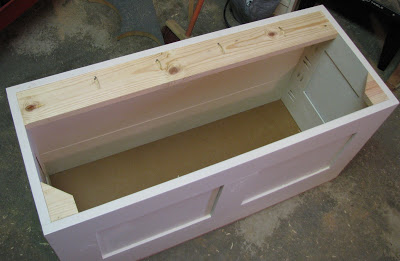
You can see that I made the bottom a little different because I personally dislike sweeping under furniture. Actually I dislike sweeping in general but that’s a different issue. I made mine go to the floor.
I used 1X pine boards and a bead board panel for the back. I haven't attached the back yet because I need to put another coat of paint on it before I distress it. I feel it is so much easier to paint bead board before you attach it. My plan is to try paste wax for the finish. I haven't tried wax before so I may end up using polyurethane we'll see.
Before I get too far into this I have to tell you about my new boyfriend the Kreg Jig Jr. Okay, it's not my boyfriend but I love the thing. (I am not getting paid to say this, sadly Kreg does not know who I am) It’s a pocket hole jig. It allows you to make sideways holes for a super strong tight hold.
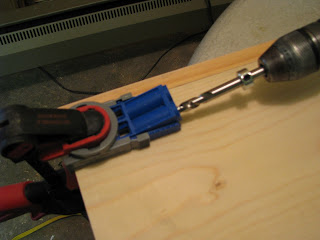

No need to measure and line things up just clamp it on and drill away. They make special screws that go with it. They have a square bit and are self tapping so no pre-drilling. Kreg you had me at no measuring, the no pre-drilling is just showing off. The thing is so easy to set up with measurements right on it for the wood thickness. You just slide the sides up or down. It is the coolest. Okay back to how I built it.
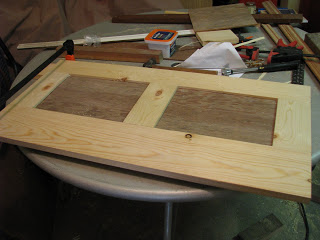
For the bottom storage box I made three panels. I only made three because the back will be against the wall so for the back I just used pine boards. I attached them together with my Kreg jig and glue.

For the bottom storage box I made three panels. I only made three because the back will be against the wall so for the back I just used pine boards. I attached them together with my Kreg jig and glue.
To make the groove in the 1x4’s for the panels I used my table saw. I had to pass each board though twice to get the right thickness. After I was done and showed my husband he told me about using a dado blade on the saw so I wouldn’t have to run it through twice. My husband believes in the right tool for the job. I believe in using whatever I have on hand that will kinda work, then think about the right tool for next time ;)

I made a jig for safety by clamping the piece I was making the groove in to a 1x6 board and then I held the clamps and stood on the other side of the fence. This made it easy to hold pieces up straight and kept me well away from the blade. I set the blade height at 3/8”.

I didn't use bead board for the panels because I thought it would be too much bead board.
For the top portion I started by cutting the side pieces. I used 1x10 pine and cut the curve out with my jig saw. To get the long cut between each curve I used the table saw.
I didn't use bead board for the panels because I thought it would be too much bead board.
For the top portion I started by cutting the side pieces. I used 1x10 pine and cut the curve out with my jig saw. To get the long cut between each curve I used the table saw.

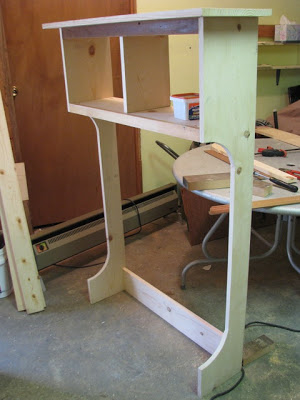
To connect everything the Kreg jig worked awesome because the screws hold it so tight that when I moved it around it stayed square which is something that would not have happened if I had just screwed straight in or nailed it like I would have done in the past. I did use glue and the nail gun for some of the trim pieces.
For the back panel I needed to router a groove for the bead board to fit into so it would be flush. I had my husband do it because I am afraid of the router. Funny how I’m not afraid of the chop saw, skill saw or the table saw but the router freaks me out. I think it’s because the first time I tried to use one I wasn't holding it tight enough and it jerked and slipped off the wood. My husband was there and said " be careful you almost pulled that into your stomach." even though I didn't even get close to my stomach that visual stuck with me and all I can think about is it slipping and landing in my stomach. Ok Wow, sorry that was a little graphic now wasn’t it. Shake it off Mimi....
Any who. So he routered it for me.
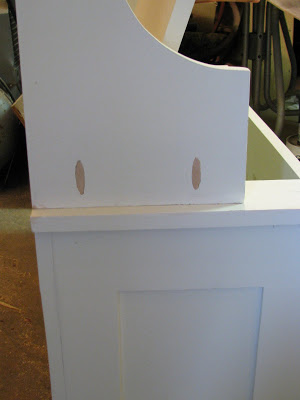
I wanted to be able to take the hall tree apart to move it so I made it so the top can be unscrewed from the bottom.
The 1x4 and those corner pieces will allow the top to be screwed to the bottom from underneath.
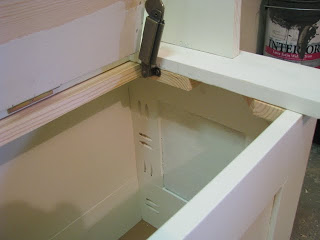
Here you can see the top sitting on the 1x4. You can also see that I definitely put the Kreg jig to work. I got jiggy with it (sorry I had to say it, that song has been running through my head since I started typing of course I only know that one line)there are a lot of holes inside the box. This would probably bother some people but not me.
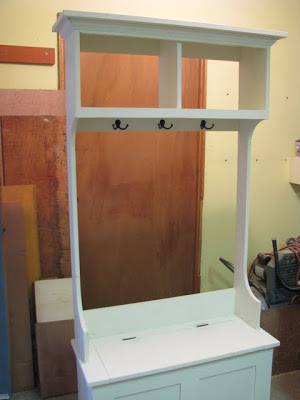

The total size is 73”h x 35 1/2”w 14 3/4”d. I painted it with latex paint.
Good thing I don’t have an entryway big enough to put this thing cause I kinda wanna keep it. I will post a staged after picture once I finish hopefully this week. Thanks for reading or even just looking at the pictures I know it was a pretty long post. This was definitely a learning experience for me it's not perfect but it was fun to build. Of course now my sister wants one but not until we finish your kitchen K Sis. Here you can see the top sitting on the 1x4. You can also see that I definitely put the Kreg jig to work. I got jiggy with it (sorry I had to say it, that song has been running through my head since I started typing of course I only know that one line)there are a lot of holes inside the box. This would probably bother some people but not me.
The total size is 73”h x 35 1/2”w 14 3/4”d. I painted it with latex paint.
Have a great week!

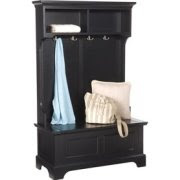
Detailed plans now on ana-white.com for hutch & bench
**Edited to add the after picture. more on that go here.